Nice find! It’s always fun (and cheaper!) to thinker with off the shelf parts.
I would buy/build this… If only the NVMe port were rotated by 180degrees, so if needed a 2280 can stick out the laptop, more versatile.
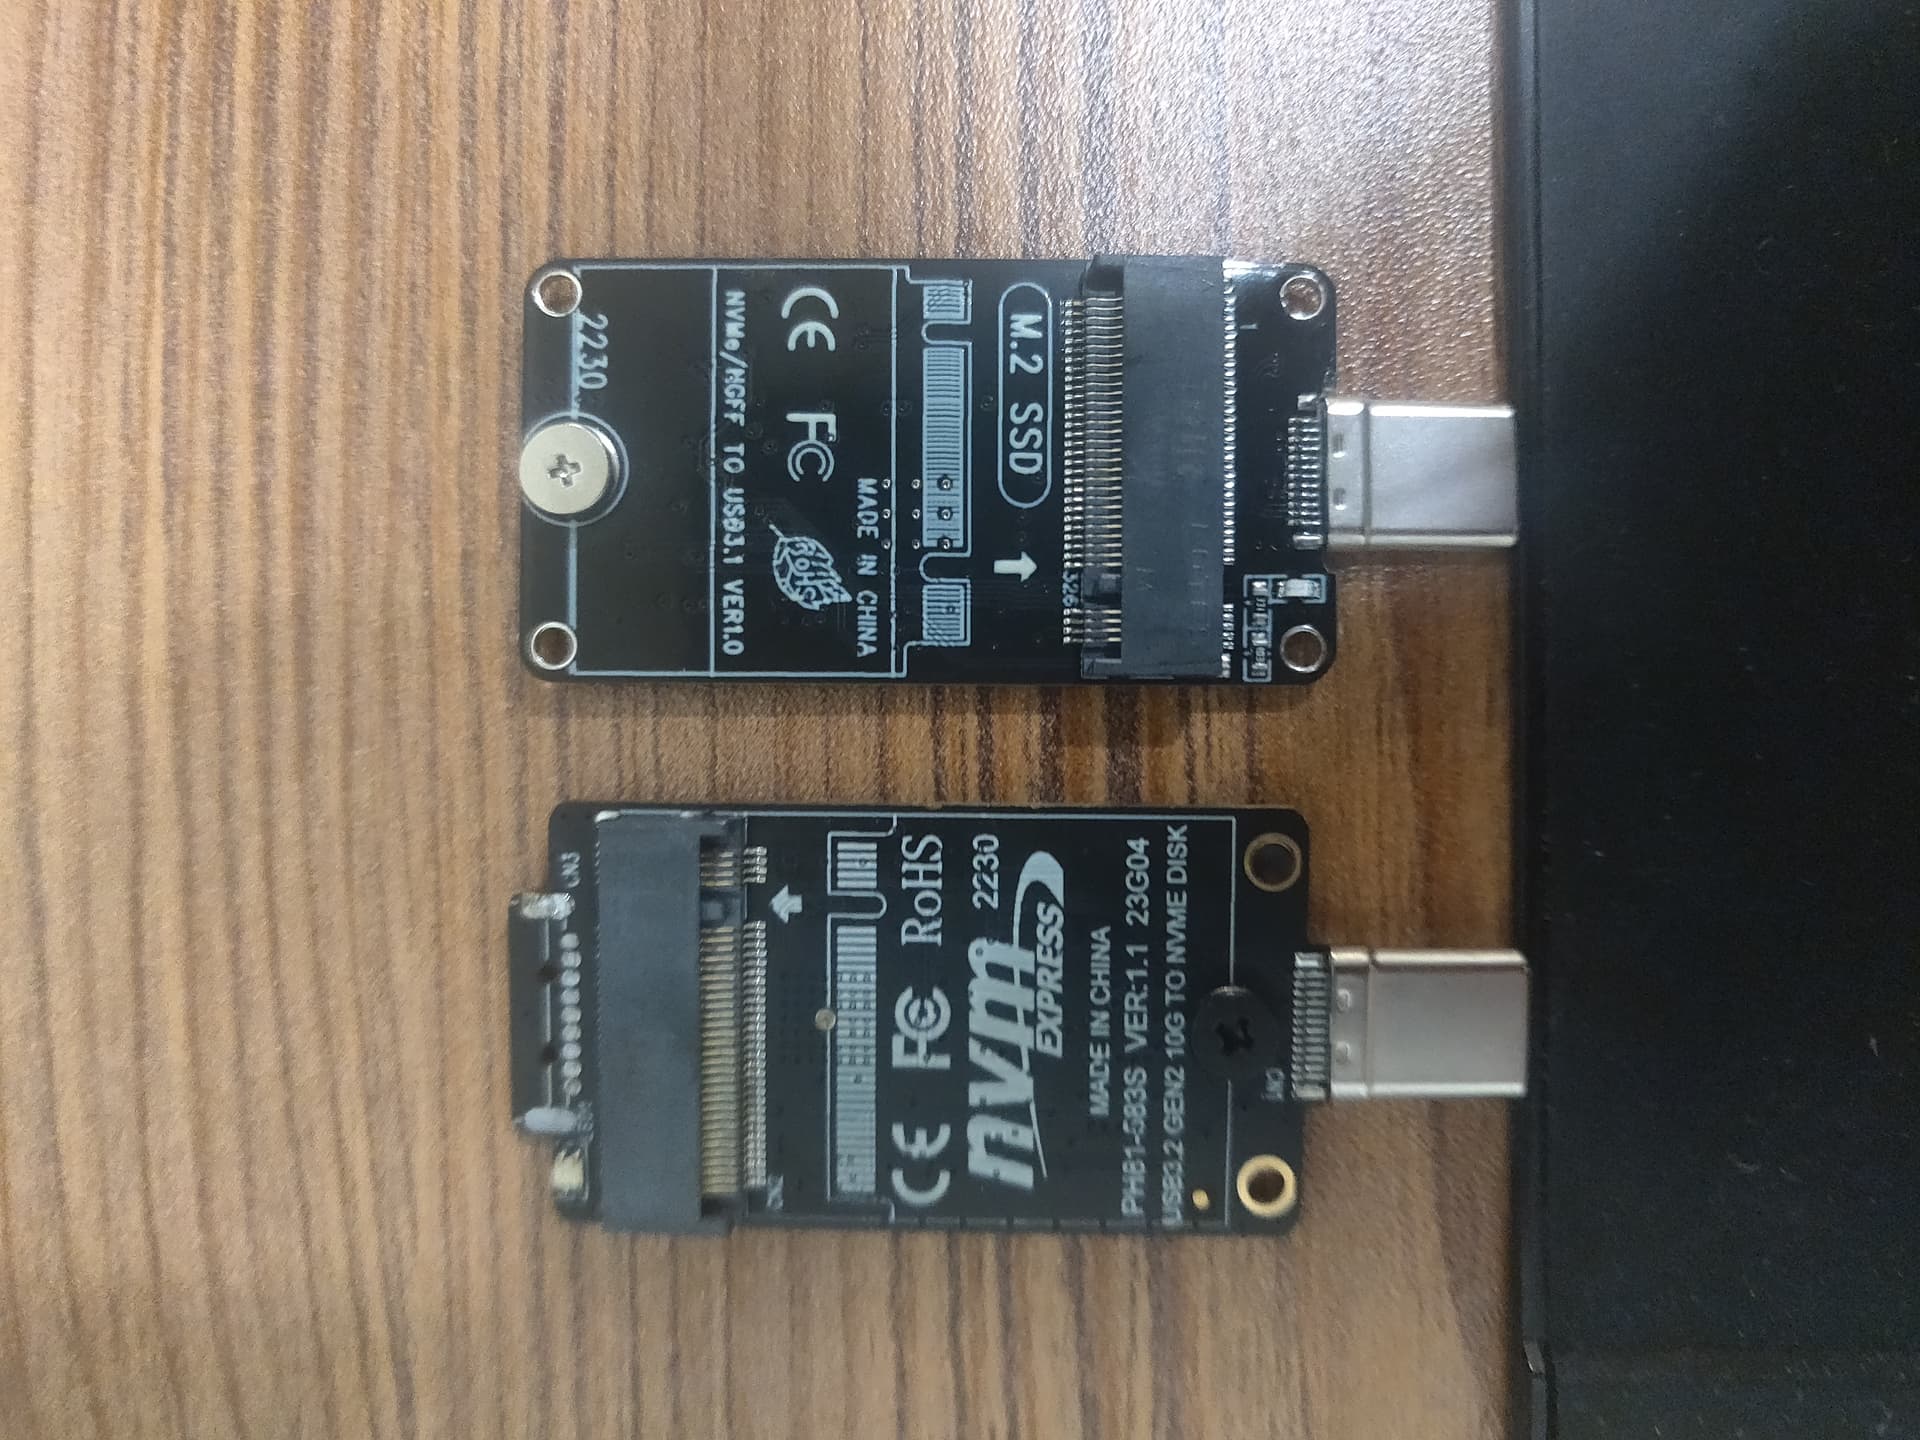
Look at the links Jacob_Padgett posted
https://www.aliexpress.us/item/3256807294354310.html
The m.2 slot looks oriented 180 degrees there

1 Like
If you need a USB 2230 M.2 case, you’re better off with this one.
I’ve got two each of USB-C and USB-A in use without any issues, but they do get hot.
100W PC passthru is just another heat source, something you don’t want close to any SSD, and it’s not enough for the FL16 anyway.
All other solutions I’ve seen in this thread so far lack the metal casing needed for heat dissipation. For the same reason, I gave up on an M.2 2230 Expansion Card.

To build on the screw idea: since you have a soldering iron, you could put heat-set threaded inserts into either the top or bottom cover. This could be a good alternative to nuts. M2 would be the perfect screw/nut/threaded insert size for the JSM board.
I won’t be attempting a 3d printer design myself (I don’t have access to a 3d printer), but I might try milling.
I don’t think there are heat-threaded inserts this small, and I don’t really want to incorporate screws into the design (also because I don’t have any screws).
If I based my design on the other, slightly shorter adapter, I could make a top cover that slots into the two back holes.
I already had a different design based on a much longer adapter this one, to be specific. I cut it down to the 2240 size because I didn’t know how I would screw down the SSD when the mounting hole for the screw is only a half-circle.
This is what it looked like:

2 Likes
Threaded heat inserts are available extremely tiny! I’ve looked at them for other projects. And by tiny, I mean M1 screw, insert outer diameter 2mm, 1.5mm height / lenght. With opposing 45° angle knurling, intended for heat inserting & holding better in that use case (striaght knurling is intended for molding in place). https://www.aliexpress.us/item/3256805590685220.html 100pcs $2. https://www.aliexpress.us/item/3256807473760054.html seller with more sizes in stock.
Of course I know you said you’re not really looking to do screws, but I feel like I should mention, since I have a link in my bookmarks and in case things change or someone else needs them.


So i made this with a board i got from ali express
Everything pretty much pressure fits in, it sits a little high as of now for a top cover, but it seems to work! here is the STL File as well
3 Likes
Any thermal issues?
Kioxia 2230 drives do get hot!
I have a few 256GB ones for testing purposes I tried with the cases mentioned in my earlier post.
I also hacked one of these together. I didn’t find a great way to fasten the top plate to the assembly on the port side, unfortunately.
Thermals generally aren’t an issue, but it’s super hot during large transfers. Mine started to thermal throttle after ~300GB.


4 Likes
After a long time I think I finally came up with a good design that has probably the smallest form factor


it uses this:

m.2 nvme to usb-c adapter
It uses no screws
It is print in place
![]() Assembly Guide
Assembly Guide
To put it together just follow these steps:
-
Remove the USB-A Port
The adapter has a USB-A plug on the other end, gently remove it. You won’t need it for this case. -
Smooth the Edges
The fit is tight by design. Lightly file or sand the back end of the adapter where the USB-A plug was to make it slide in more easily. -
Clean the USB-C Port Opening
Check the opening where the USB-C port goes. If there’s any leftover filament from printing, clean it up with a small knife or file. -
Insert the Adapter
Line up the USB-C port with the hole in the case and press it through. It should click into place and sit flush. You might need to press firmly—it’s a snug fit. -
Add the top cover
Now just add the top cover (optional)
5 Likes
I would suggest printing that piece with the pins parallel to the print bed. You will have to remove some support material, but the layers running the length of the pins and into the flat portion (instead of just laying on top of the flat part) will greatly improve robustness.
2 Likes