@rednight39 so far I’ve only printed PLA versions of the bottom case and those have been plenty stiff enough. IIRC I’ve printed them with 1mm thick side walls.
Ultimately I want to get it printed on an MJF machine out of glass bead filled PA12. The PA12 has lower modulus of elasticity than PLA, so I expect it to be a little bit floppier.
Now that you’ve uploaded PCB designs, I think this can be a great help for a lot of DIY Framework builders, not just for Thinkpad designs but any case design where space is very limited.
For instance, I am facing a challenge on how to add power delivery and high speed data where there’s a very small clearance for the board’s USB-C ports. I’m not a electronics engineer expert and USB 3.x protocols are a complicated beast to me, so I will be watching this thread even more closely with the design updates that you make. Keep it up!
Thanks, @ccRicers! I assure you that I am just as intimidated as you about USB 3.x. Previous to this I had only ever piddled with USB 2.0. My design doesn’t include any power delivery provisions, so I can’t be of much help there.
Some updates: I’m waiting on some new parts for my 3D printer so I can do a final test print of the case before sending it off for manufacture.
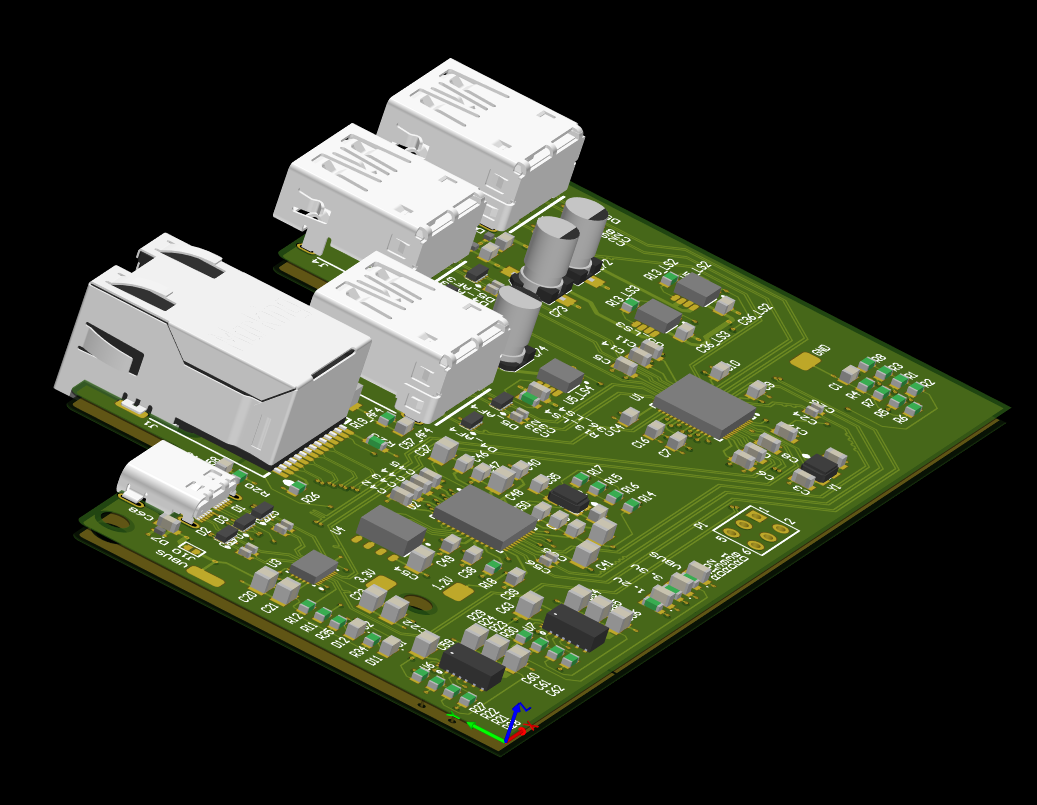
I’ve put in a big push to finish up the USB hub design. It’s now at a state where I’d consider it done. Overall I’m pretty happy with it, but I’m hesitant to push the order button. I’m pretty much entirely self-taught in board design and I’ve never done anything this complex before. I’ve asked a friend who does board design professionally to review it and give me feedback. All the latest design files are in the github repo.
My friend hasn’t had a chance to review the hub design yet.
The Chinese new year added some delays to a board order I put in, so I’ve been waiting on those.
The parts for my 3D printer came in (upgraded my single head Prusa XL to a 5 head), so I got those installed and ran off a full batch of mechanical parts. I’m in the middle of doing (hopefully) a final test assembly of those parts now.
I also did a bunch of clean-up on the CAD side and uploaded all of the latest revisions to the github repo, as well as a WIP high level BOM and some annotations on which hardware goes where. I also uploaded all of my 3D scan data. Files are here: https://github.com/basketofkittens/framework701c/tree/main/Mechanical
Finished up the test assembly last night and I was satisfied enough to hit the order button on a glass-filled Nylon-12 MJF print of the bottom case from Xometry. It came out to just over $200. Should have it in my hands in a couple of weeks. The version I ordered is in the github repo.
I also assembled and tested the “USB U-turn” board that will connect the USB hub to the Framework mainboard. It’s essentially a tiny USB cable that makes a very tight 180 degree turn. The trace lengths on the diff pairs are matched, but since it’s only two layers there isn’t a hint of impedance matching. It’s not my proudest achievement, but it does work. I don’t have a fancy VNA to actually quantify the performance margins. I instead ran some DiskMark benchmarks on an external SSD and hit about 1GB/s consistently, which was the same as the commercial USB-C cable I usually use.
polymatt just uploaded a video showcasing a series of replacement 3d printed case parts he made for his 701C, which he has released the files for on printables and makerworld
Perhaps this could be the start to mass cloning of framework 701C laptops without having to find an existing 701C to cannibalize for parts?
There is still a rather large hurdle of the keyboard assembly, but I imagine that could also be 3d printed. I’ve heard that similar vintage ThinkPad keyboards use a rubber sleeve that is still being manufactured by Toshiba for their MCANPOS keyboards, so that would be one less part that would have to be manufactured from scratch, there are also commercially available trackpoint modules that are popular in the mech keyboard customization community.
I won a parts 701c on ebay, after seeing this project. Working on the J̶l̶c̶p̶c̶b̶ ̶o̶r̶d̶e̶r̶.
Parts are on the way, had to get the molex elsewhere so ill be putting those on by hand. The updated motherboard adapter with a usb hub I am making tweaks to, it connects to the usb4 port on a ryzen motherboard and at a minium im going to move the usb down to the slower port. Since I have the project opened up and have to reroute anyways might throw rs232 and dc power in.