Hey folks! I was one of the folks lucky enough to get a Framework mainboard for a project. For this project, I will be creating a wheelchair PC. I’ve seen the wheelchair adapters for laptops, and I think it will be much cleaner to use the Framework mainboard as the heart of a more modular design that’s much more user-focused. What’s also nice is that, on a wheelchair, many of the weight limitations are neatly avoided, so you can do crazy things like have large batteries available.
I will need to build this thing out a bit. I’ve built a fair number of desktop PCs. I think the only things I’m not familiar with on this are the wifi card and battery.
For the WiFi, the card itself makes sense. The problem is the antenna, as the one in the framework store won’t be a good fit for my needs. Does anyone know what those laptop antenna connectors are called? I just want some loose wires of the appropriate length that I can design into a case, or maybe some router-like adjustable antennas.
Depending on how the USB power works, I also wonder if it’d be possible to hot-swap batteries. I think that largely depends on how quickly the system would switch to a new power source when the initial one is disconnected.
Are there any things people have been dying to try out? I figure, with a freebie board, it may be worth trying out some wilder ideas.
I have seen it here. Without Battery the laptop needs a bigger power supply for boosting. Sometimes the laptop uses the wall power plus the power of the battery.
Regarding the power cycling, there is a switch on the mainboard that you can use to power cycle the mainboard. Otherwise the wake on power BIOS option can be used.
From my brief foray into antennas, it’s also an option to just solder the U.FL wires to the SMA core and sheath, no? Definitely a sub-par solution, and it lacks polish, but it’s there
Sure, if you have the soldering skills. No reason it wouldn’t work if you can handle it, and you avoid the attenuation you’ll get when you add connectors and wire.
Making good progress on this project. For now, I’m just trying to get things done, and take video of the whole process. I’ll document more and add details later.
In the meantime, I’d love to have a stern discussion with whoever created the Audio Proximal Demon Tab. Not sure what I’m talking about?
This little bugger, right here.
This board is mostly awesome for making stuff with. 97%. That tab is 2%. The last 1% is comprised of other motherboard bits which make it so the USB-C ports on the motherboard are ever-so-slightly not the most sticky-outy (technical term) piece of the motherboard. It means that I either a) have to adopt the adapter approach, which adds a lot of width to the project, b) I have to do some pretty intricate design work to get my USB access recessed in comparison to the rest of the case I’m crafting or c) I have to snip bits off of the motherboard (ew). For now, I’m taking approach b. If the USB-C ports were completely flush with the rest off the board, or protruded out 1mm or so, it would be a slam-dunk for a wide host of maker projects.
Can confirm, my first set of U.FL connectors don’t fit. They’re darn near indistinguishable from one another, and the wifi card manufacturers aren’t keen on putting the connector size on there (insert grumbling here). Trying MHF4, they’ll be here Wednesday. Thankfully these bits are really inexpensive.
In the meantime, I’ll have more time to get a good paint job on the case. These are the inside bits. Please pardon my excessive wood glue drip on the inside.
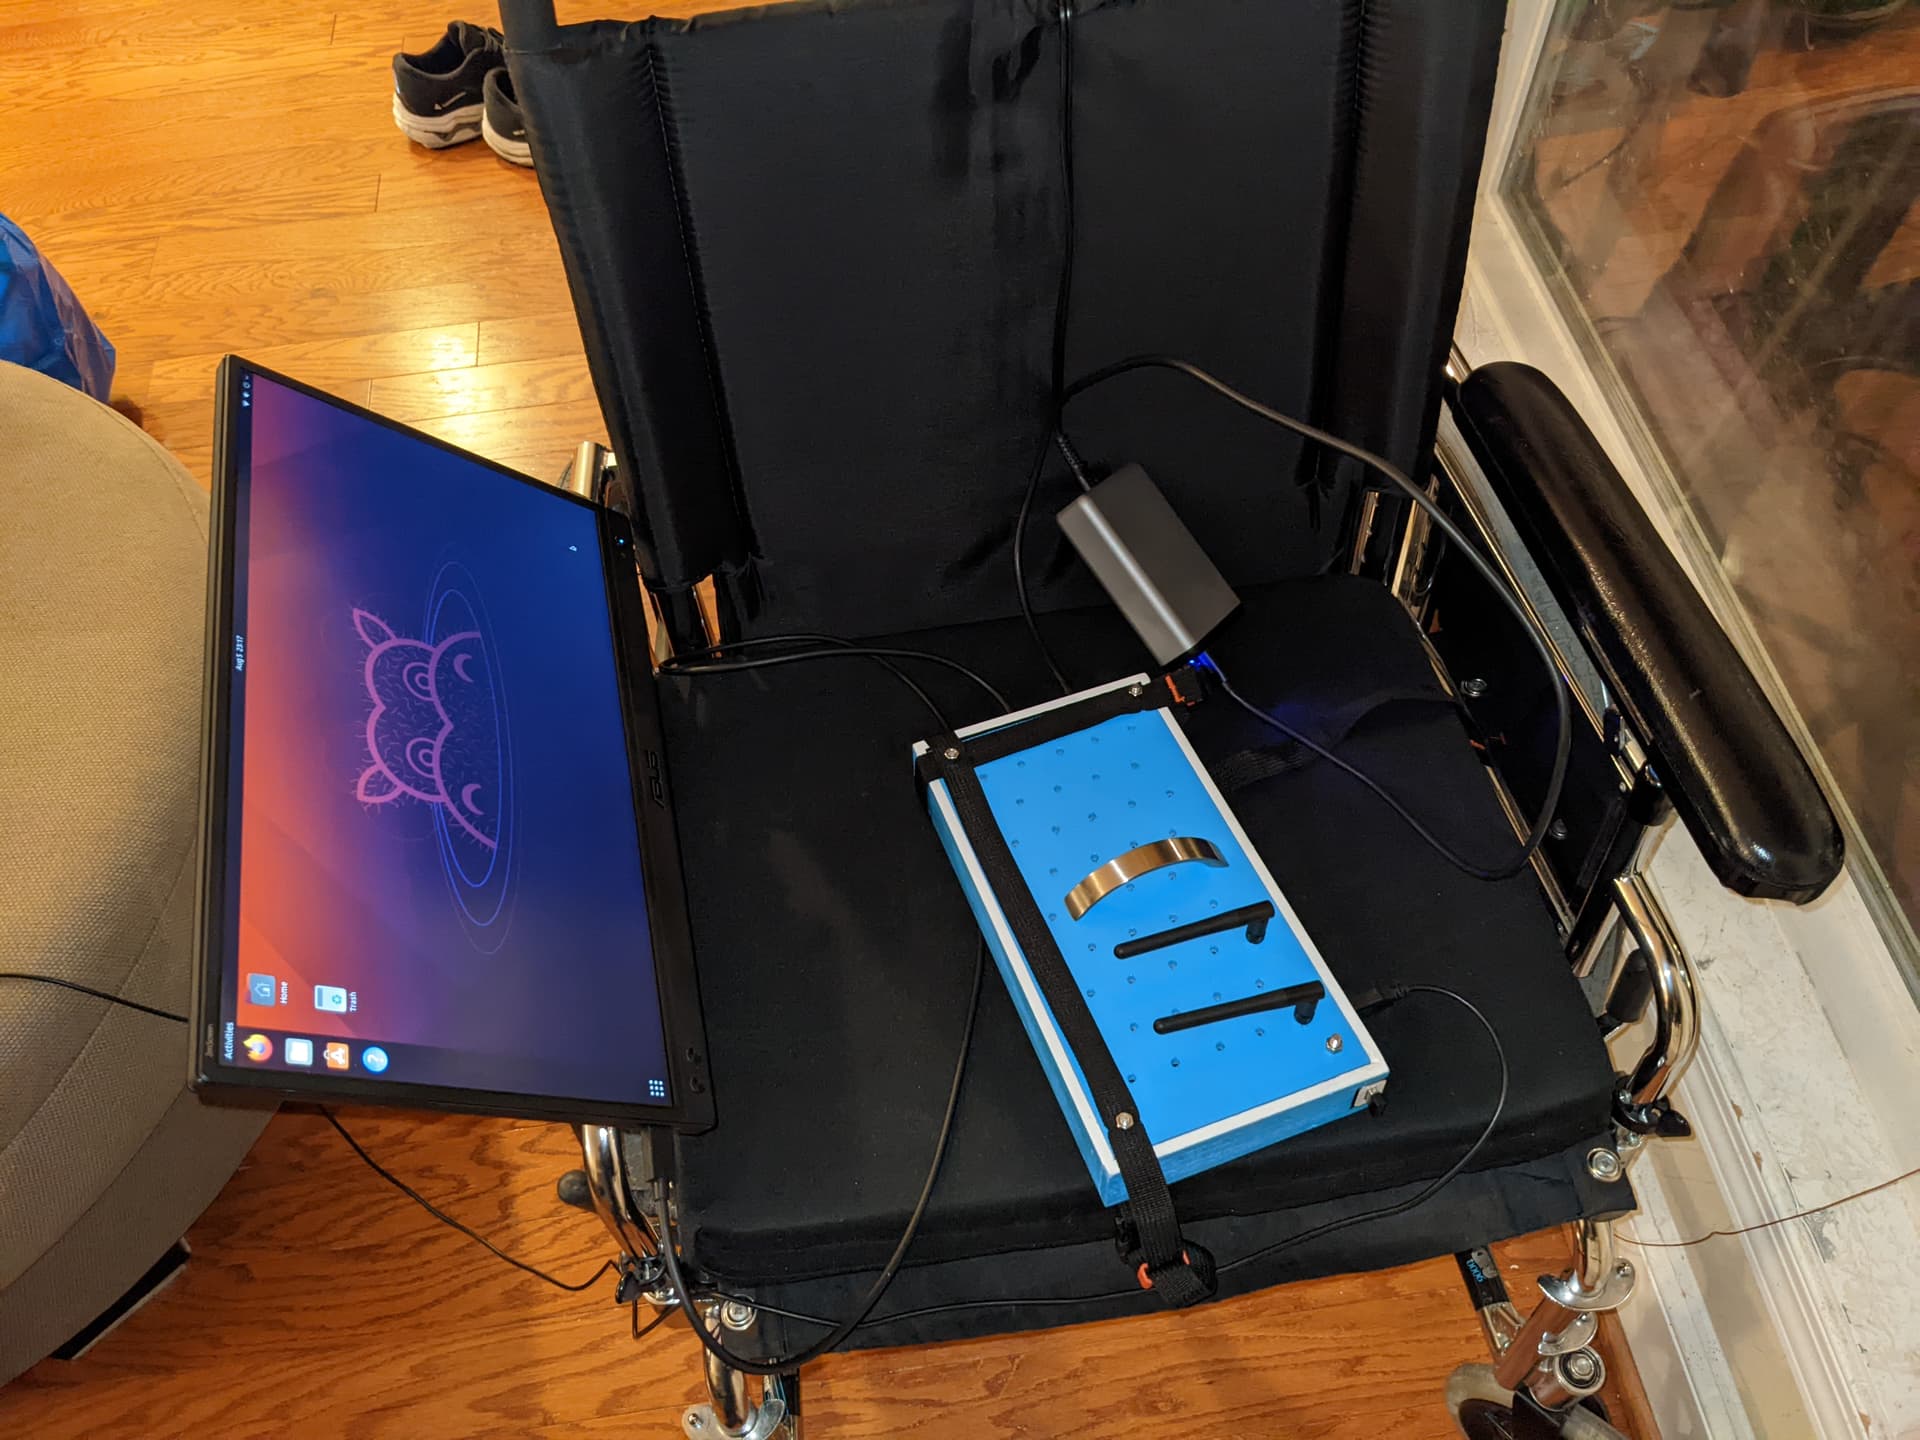
Hey all! It’s done! Took longer than expected, but life got in the way. I’ll do a full build video, but I thought I’d provide a final photo! I really like how I was able to mount the monitor out of the way in an adjustable fashion. The biggest inconvenience is the keyboard wire (just the keyboard I had laying around).

 No reason it wouldn’t work if you can handle it, and you avoid the attenuation you’ll get when you add connectors and wire.