I am building a custom chassis for the FW16 platform that will involve two noctua desktop fans. I am not sure how to control these fans through the desktop (they are fans for the GPU). They are 12V fans. Are there any usable fan headers on the board?
I know close to nothing about controlling fans on laptops, appreciate any help I can get.
1 Like
So you will still use the stock fans?
If not just cut of the stock ones and soldier in the noctua ones.
That way you still have the PWM control and it should ramp the fans if CPU or GPU get to hot.
1 Like
Yes, I’ll be using the stock fans for the CPU. These fans are specifically for the GPU and are in a different location where they can’t blow air to the cpu as well. (custom chassis).
It should be possible to splice out the PWM signal from the CPU fans and have them also control the GPU fans. They will than obviously run at the same speed.
You could also use a USB fan controller.
1 Like
Thanks! Do you know if the FW16 has two seperate PWM lines for the two stock fans? If so, I could splice one for the CPU and one for the GPU fans right?
@Seven_Murasame No they cool it together.
They blow the air out of the CPU heatsink on the Left and Right And the GPU Heatsink is in on the Top in the picture so hey cool it at the same time. You can alsow see the Fan connector if you zoom in.
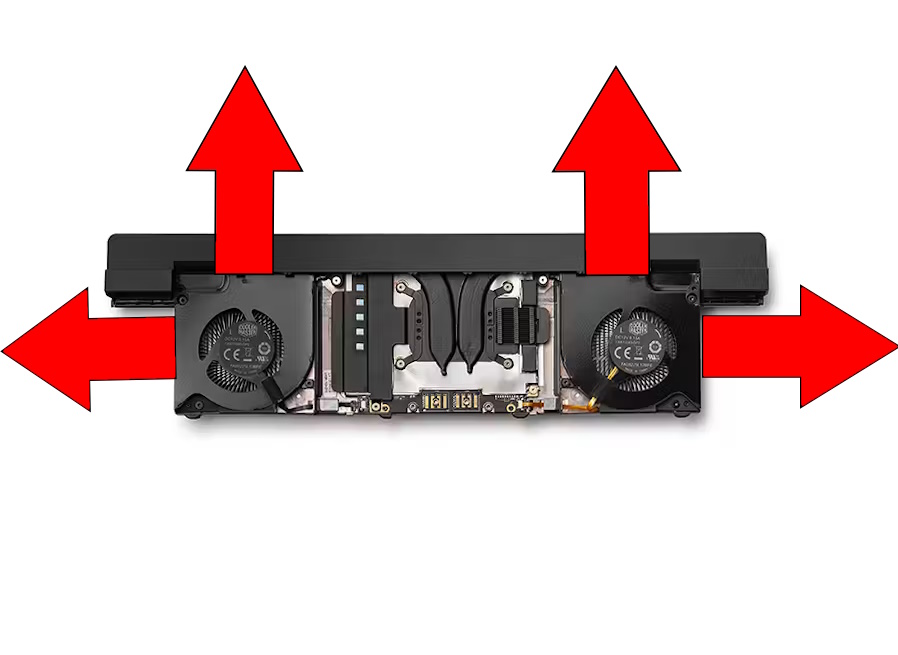
Graphics Module
Upgradeable graphics in a notebook are finally here. Slide the Graphics Module in for a massive boost in gaming, creation, and simulation performance. Configured with AMD Radeon™ RX 7700S, the Graphics Module contains 8GB of GDDR6 memory, 32 compute units, 100W TGP, and 2x 75mm x 11.5mm Cooler Master fans. Increases the thickness of the rear section to 21.95mm
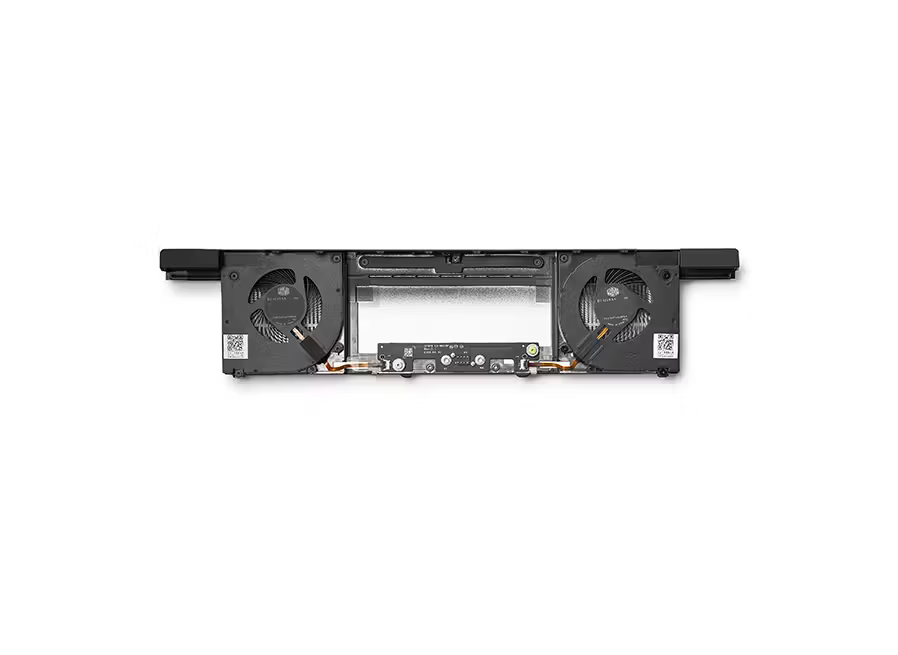
Expansion Bay Shell
The default Expansion Bay Module enables a thinner, lighter system, containing 2x 75mm x 8.2mm Cooler Master fans. If you’re a developer looking to utilize the PCle x8 interface and create your own high-power modules, the Expansion Bay Shell is a great place to build upon with over 35cc of empty space for components. Check out our GitHub repository for more information on how to get started.
3 Likes