Highlights
- Updated AMD PhoenixPI-FP8-FP7_1.2.0.0e.
- Modified the F2 key in the F12 Boot Menu to go to the setup menu instead of the settings menu to allow easier navigation to secure boot settings.
- Enhanced the Power On AC behavior, allowing the feature to work correctly without requiring the system to boot into the Operating System at least once for initialization.
- Enhanced fan detection logic within the Input Module app.
Note:
- Once you update to 3.18, you can only downgrade to 3.06 or above.
You can check your current BIOS version following the steps here to determine if you are on the latest release.
Subscribing to release notifications
If you want to subscribe to new release notifications you can now opt in through this link to receive an email when we release a new BIOS or driver update for your Framework Laptop.
Downloads
Windows
| Download Link | SHA256 |
|---|---|
| Framework_Laptop_13_Ryzen7040_BIOS_3.18.exe | 91E6A69C848FBCB0E493A215F617124316685F26576C733A571658329F4F45EA |
Instructions for Windows Installer:
- Run the .exe.
- Click yes to reboot.
- Wait for the firmware progress bar to complete, and then the system will reboot.
- If you are updating a system in standalone mode, please pay careful attention to the standalone update process below.
Please note that you must update with a charger attached.
Linux/LVFS
Please note that you must update with a charger attached, then run:
fwupdmgr refresh --force
then
fwupdmgr get-updates
then
fwupdmgr update
Please note that you must update with a charger attached.
LVFS may not update if the battery is 100% charged. LVFS uses the battery status to determine if it is safe to apply updates. However if our battery is at 100% and the charger is off, we set the battery charging status to false. In this case you can discharge your battery a few percent, then plug in AC again and run fwupdmgr update.
Linux/Other/UEFI Shell update
| Download Link | SHA256 |
|---|---|
| Framework_Laptop_13_Ryzen7040_BIOS_3.18_EFI.zip | B5D9E7D0A20C34B308CFE62D27B2B4E9705EDFFBFD693DF0A58A834FD46F9408 |
Note that if you use the EFI shell update with Windows, you should suspend Bitlocker if enabled before updating using the EFI updater.
Instructions for EFI shell update:
- Extract contents of zip folder to a FAT32 formatted USB drive. Cleanly unmount the drive before physically removing it, otherwise the BIOS update may not function correctly.
- Attach a charger to your device while updating.
- Boot your system while pressing F12 and boot from the thumb drive.
- Let startup.nsh run automatically.
- Follow the instructions to install the update.
Updating a Mainboard outside of a laptop
This release supports standalone updates without a battery attached. After rebooting, please follow the onscreen instructions to update your BIOS when in standalone mode, which will require moving the power source between both sides of the Mainboard to allow PD firmware to update correctly.
Please note that the power and display output must be connected to the same side during standalone updates. Failure to do this may result in no display output during the update process.
We recommend the following update flow for standalone updates:
Part 1
Ensure that standalone operation is enabled in the bios advanced setup menu.
Display connected to upper left port.
Power connected to the lower left port.
Run the updater from EFI/Windows updater.
After rebooting into the updater the update will commence:
The updater will update the BIOS and EC.
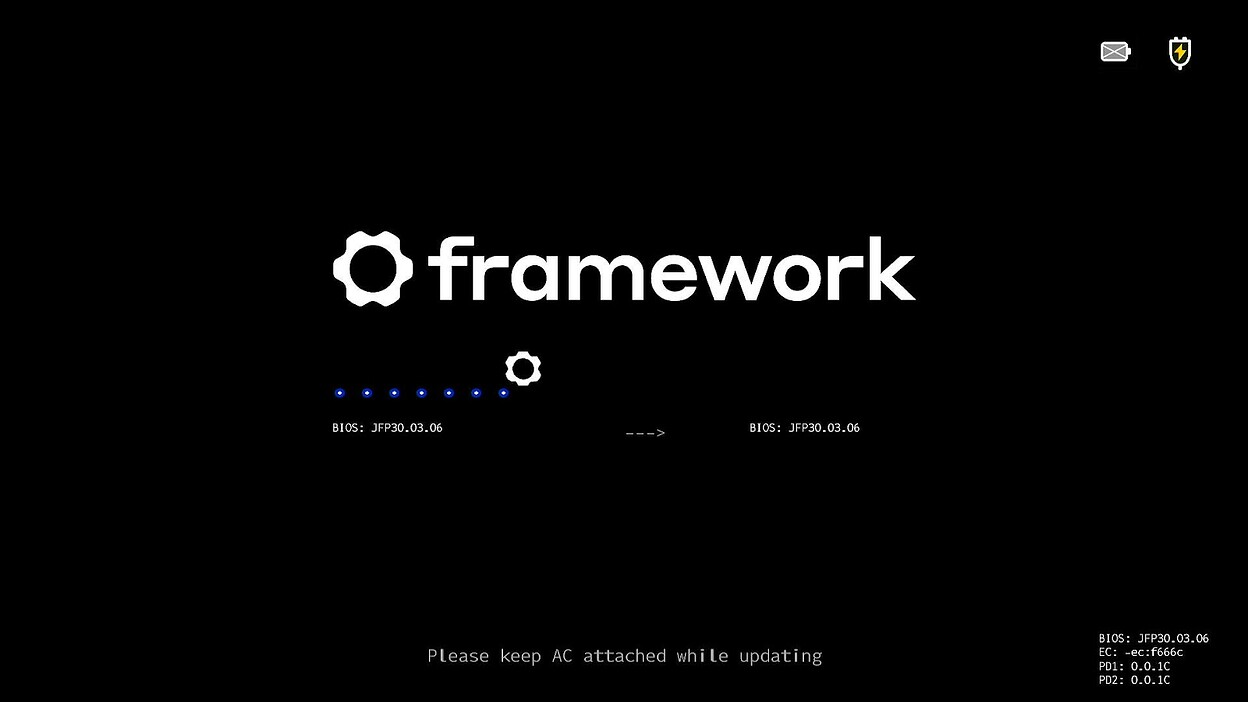
The Updater will update the PD controller that is not connected to the power source.

You will see one PD controller will fail the update with the X, and “update complete” is displayed, but the bios will restart.
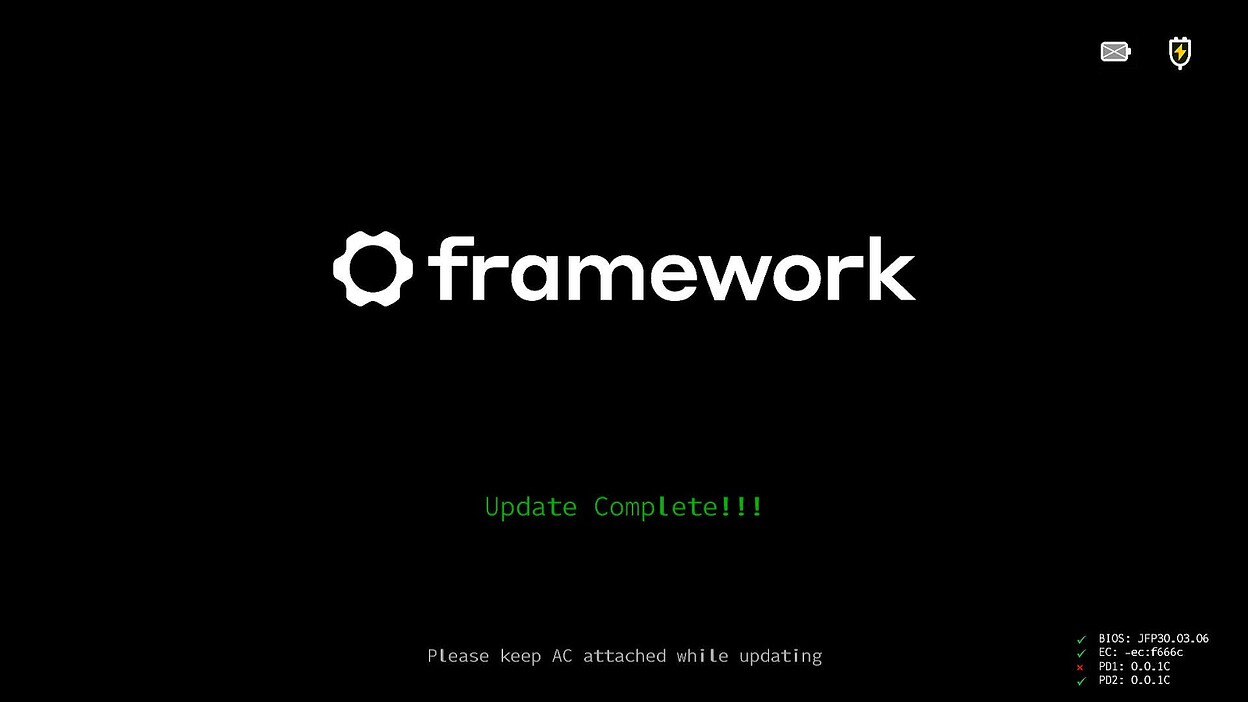
Part 2
At this screen, the bios update will stop. You must disconnect the display and power source, and move them to the other side.
The display should be connected to the top right.
Power should be connected to the bottom right.

Press the power button, and the second PD update will complete.
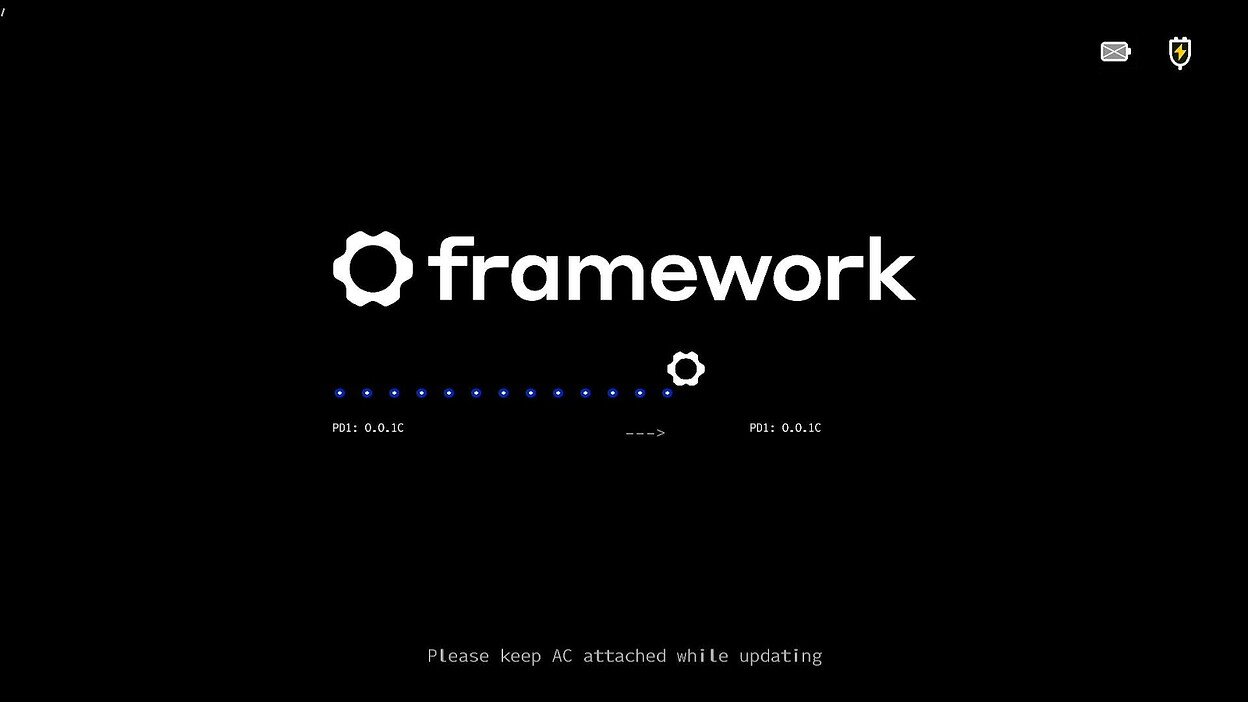
After this, the system will reboot, and your bios update is complete.
Security Fixes
N/A
Enhancements
N/A
Fixes
- Updated AMD PhoenixPI-FP8-FP7_1.2.0.0e.
- Modified the F2 key in the F12 Boot Menu to go to the setup menu instead of the settings menu to allow easier navigation to secure boot settings.
- Enhanced the Power On AC behavior, allowing the feature to work correctly without requiring the system to boot into the Operating System at least once for initialization.
- Enhanced fan detection logic within the Input Module app.
Component Versions
This BIOS update is a bundle of updates to multiple embedded components in the system.
Not all of them use the same version number.
| Firmware | Version | Updated? |
|---|---|---|
| BIOS | 3.18 | Updated |
| EC | ec_318_76610 | Updated |
| PD | 0.0.1C | Same |
| AMD PI | 1.2.0.0e | Updated |
Reporting Issues
To report issues we have created a public issue tracker on github. GitHub · Where software is built We hope that this is a better way to track issues with community involvement moving forward as we have found it difficult to both gather relevant information about issues people are reporting on the forums, and track the issues through their lifecycle in a transparent way.
If you do experience an issue with the update that is related to your system firmware, please post as complete a description as you can, including relevant system information, and external peripherals. Please note that we do not currently have a SLA for responding to issues on github, but we will be reviewing them through the bios release process, and will review them for future updates as well.
If you have an issue regarding hardware, broken devices, returns, etc, this is not the place, please contact support.
Known Issues
- BIOS display output may not show up in standalone mode when booting the first time. To work around this issue we suggest booting into the OS and then restarting and pressing F2 to enter the setup menu.
- When updating in standalone mode, there may be no display output after updating one side’s PD firmware. Suggest connecting power and display on the same side when performing a BIOS update in standalone mode.
- Connecting with iPhones over type-c may be unstable.