I’ve seen a few posts of this issue related to the AMD boards but not the Intel Core boards. I put an i7 Core motherboard into the Cooler Master case. I added an HDMI, USB-C, USB-A and Ethernet expansion cards.
HDMI → Monitor
USB-C → Power
USB-A → Keyboard/mouse dongle ( A Logitech K400 like we all have lying around )
Ethernet → Has CAT6 plugged in but primarily using it as another set of LED lights to see if the board is doing anything else. They do light up fwiw.
When the board gets plugged into power, the LEDs on the left and right start blinking right away alternating red and blue. I don’t need to hit the power button, they light right up when the power is applied.
In the AMD posts, I read that the board will do a memory check of sorts that can last 10+ minutes. I’ve had this little guy next to my desk for the last hour with no change. With this being an Intel board, I don’t know if it should act the same or not.
Also, unless it’s on by default, I did not adjust the standalone mode in the BIOS. I removed the SSD and one stick of memory to try and get it to respond in any other manner, nothing. The memory module is in slot 0 (left side as it’s labeled). I also tried both sticks I have. The modules I have are 32GB DDR5 (64GB total) and are actually going to go in my new AMD AI unit when it arrives.
I have a couple spare FW displays and batteries lying around. I don’t have a spare chassis tho. I could try to Frankenstein this together but I’m curious if there is something else I can try before I clear my workbench and cobble these parts together into something that resembles a computer.
If I do Frankenstein this, I’ll make sure to take pictures if it behaves any different. I figure the pics will amaze and awe some folks; and the rest of us may cry at the abomination.
2025.04.22 EDIT: Can I presume this is a very “isolated to me” problem? I didn’t want to bug official support if I didn’t need to.
have the same problem with my amd 7040 motherboard standalone and currently can’t find enough instructions on how to solve the problem. Am almost at the point where I’m gonna contact support too
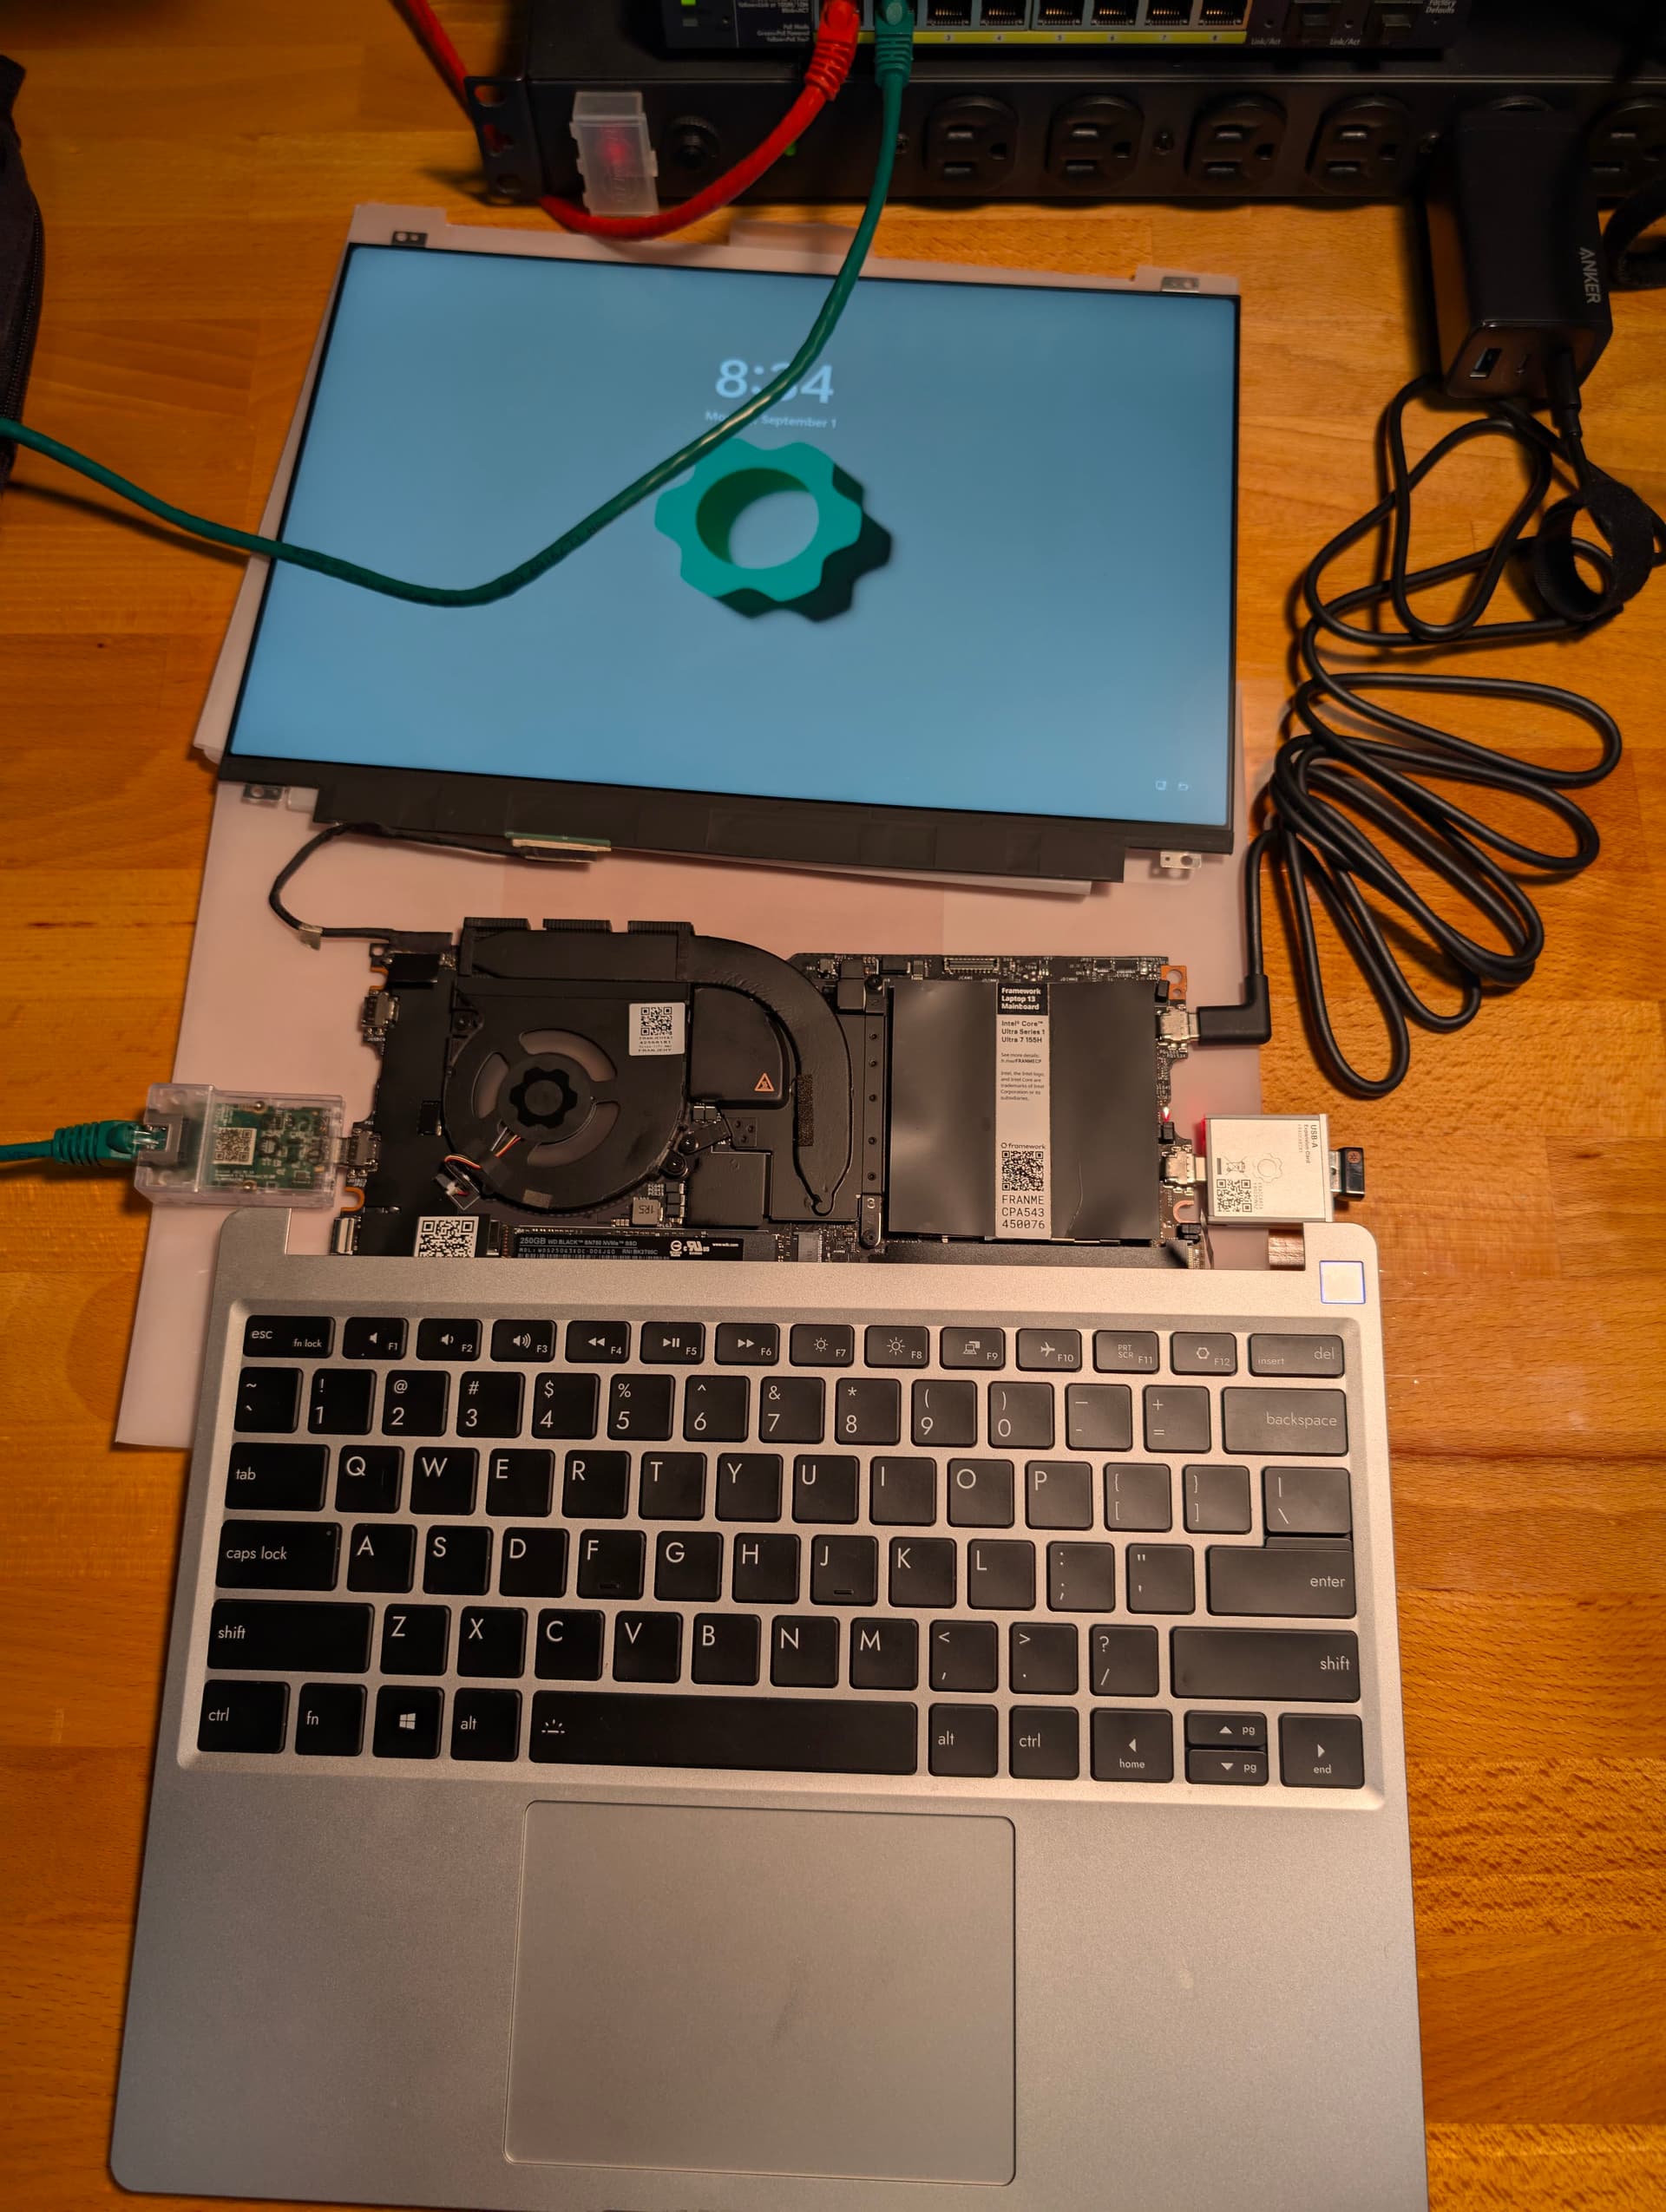
Just to update and provide info. The Frankenstein I spoke of, is in the picture.
In the process of pulling this together, I did use a 16G stick of memory instead of the 64G I previously mentioned. My AMD AI had showed up before hand and I needed the 64G for that. I borrowed the 16G module from another FW13 Core Ultra laptop I had.
A few things to note that I learned:
There is a chassis intrusion switch that I had no idea about. That became important as I went through this. I spent far too much time troubleshooting issues until I realized this. FWIW, it’s up in the top middle-ish of the mainboard. Until the BIOS is put into standalone mode, you need to keep that pushed down a fair bit. As I write this, I do forget if I needed to keep it down all the time or just at boot.
The BIOS of the board was horrendously out of date. It was still at 3.01, and I believe I had to go 3.04 and then to 3.05 to get it stable. Going from 3.01 to 3.05 directly was not possible.
Because the BIOS was out of date, the board would not boot without the keyboard and monitor attached. The keyboard didn’t function well when attached. I presume it was due to how it’s hanging out of the chassis on my workbench, hence the USB dongle for everyone’s trusty K400 keyboard. Don’t say you don’t have one, we all know you do.
Getting the laptop into Windows made the BIOS updating WAY easier than I was expecting. I couldn’t remember what was on the drive I used for this, luckily it was Windows. While I am primarily a Mint user, it was late when I was doing this and I was glad for the shortcut of using Windows. Depending on the amount of caffeine you’ve drank, you can make the decision of how you want do to that update.
Once the BIOS was updated I was finally able to get into it and set the standalone mode. YAY! I didn’t have to worry about the intrusion switch. I could disconnect the keyboard deck and display. I plugged in an HDMI card, USB-C for power and the NIC card and was finally able to get Ubuntu server on it.
I have 3x FW 13s and this 4th mainboard. The reason I went down this little endeavor was to determine if I could create a decent Proxmox host and eventually be able create a 3 node cluster and have the appropriate expansion cards for an iSCSI connection, main vlan access and power. So at least 1x USB-C and 2x Ethernet cards.
This was a whole lot of work for an experiment but while tedious and frustrating to figure it all out, it was crazy satisfying when I got it all working.
So not sure if this will be helpful to anyone but I did want to wrap up what I started here and mention that I did actually get to my goal, and document the steps and observations I did/found along the way.