Uneven CPU thermals!

Please let us know if support does end up fixing it for you.

I probably could do it myself.

But Framework lost most of my goodwill after my previous support experience. I feel like I’ve gone above and beyond for them, while they’ve repeatedly barely done the bare minimum after much poking and prodding.

Imo them sending out a PTM kit and having me fix it is once again the bare minimum. Great to have as an option for folks who want it. But to have it as the ONLY option isn’t great.

6 Likes

So my RMA was on hold since December. After a lengthy back and forth checking in every month for availability of the new boards without liquid metal i finally was able to move forward with my RMA. 2 days ago they said they will honor my RMA request that I opened in December and now they have pretty much exhausted the inventory of old boards. They are sending me a new board “supposedly” without the Liquid Metal and once I get it i can send my existing board back.

I am personally happy they honored my RMA request since I still have 4 months remaining on warranty. For me they did the right thing for which I am appreciative they kept their word. I did have to send pictures and analysis results from Cinebench R23 etc… but I was OK with that request it was a reasonable ask and my numbers had fallen to 10-11k range. Liquid Metal degrades quickly over time.

5 Likes

Are you definitly looking at a CPU sensor? That’s a very low number… 80C would be impressively low. 46C doesn’t even make sense.

4 Likes

Just replaced my liquid metal with PTM and it works amazingly. I couldn’t get a pre replacement test to compare it with, but referring to my previous trials from a few months ago I went from a degraded 48W 100C LM to 54W at 95C PTM, or 54W at 98C from a fresh LM motherboard a while back. Here’s hoping it doesn’t degrade again because I do not want to take apart the whole laptop again.


Look for local hackerspaces or now called makerplaces for help. If one brought one into one my places, I’d be glad to help. Just be sure of their abilities.

After some thermal cycles on the ptm (no shim) my cinebench score rose from 13.7k to 14,970. I was hesitant to believe there being a settle in period, but it appears to have some merit.

In my opinion, unless you’re really passionate about it, the custom shim isn’t worth the effort. I’m pulling a steady 50W out and I’m more than happy with that, especially since it’s without the effort of soldering.

1 Like

The burn in period is definitely a thing. When I first did the modification I was sitting at low 14,000, and about a week later after some thermal cycles on the ptm it’s at 15,450, so you definitely have to wait to get the full performance out of it.

I find that fascinating. The mechanics of that don’t quite make sense to me, which makes it interesting.

The free PTM pad arrived today, I’ll be holding onto it since the PTM sandwich mod I did is still going strong, I’ve been running CB R23 occasionally to check if everything’s fine, still holding 16k, with occasional dips to 15.9k when weather gets warm.

Just received my replacement board without the Liquid Metal. After work tonight I will swap it out and run some Cinebench R23 tests. This was a RMA that had been on hold since December and they kept their word. Happy with the outcome!

7 Likes

The Soldering of the shim was my try to further improve the performance. The Shim sandwich i advise does not use any soldering.
Yes i was able to hit 80w peak and 62w sustained with my soldered shim and liquid metal, but thats not worth the risk.

The properly cleaned and lapped Coppershim does reduce the tempdelta further than just ptm on the og shim.

3 Likes

Think of it as the heat cycling causes tiny insulating bubbles to “boil off”.

My PTM arrived, I’m unfortunately in the middle of a large infrastructure change so will get to it after everything is done.

Well in the right directiin but not perfectly true.

The PTM transitions to nearly fluid when heated, the mounting pressure squeezes the Material out and reduces the thickness of the bondlayer. With every heatcycle the bondlayer reduces and gets slimmer tho reducing the thermal resistance. The phase transitioning stops after a certain time of heatcycles.
Thats why if removed it feels like hardened thermal paste.
PTM has next to no performance reduction over time and doesn’t need replacement like thermal paste or liquid metal.
Tp performance reduces alot when it hardenes and liquid metal has molecular transitions with the heatsink creating pitting and also hardening of LM.

Last weekend I got around to doing the PTM + soldered shim mod. I ordered a new heatsink and had some leftover Thermal Grizzly Phase Sheet from repasting my previous laptop.

Heatsink Adventures

It was my first time doing any kind of work with solder paste and a hot air rework station, so I was quite nervous. I lapped down one of the copper shims I ordered, and measured it to be .72 mm in thickness when I installed it. I removed the black sponge around the shim in the new heat sink and used the hot air station to remove the old solder with some cotton swabs once it was liquid again. I applied the solder paste to the new shim and stuck it onto the heatsink, and applied the heat until the solder paste went liquid. I kept the heat on some more time to give me a chance to press it down, and pressed it down with a wooden tool. I cleaned some of the extra that squeezed out of the bottom.

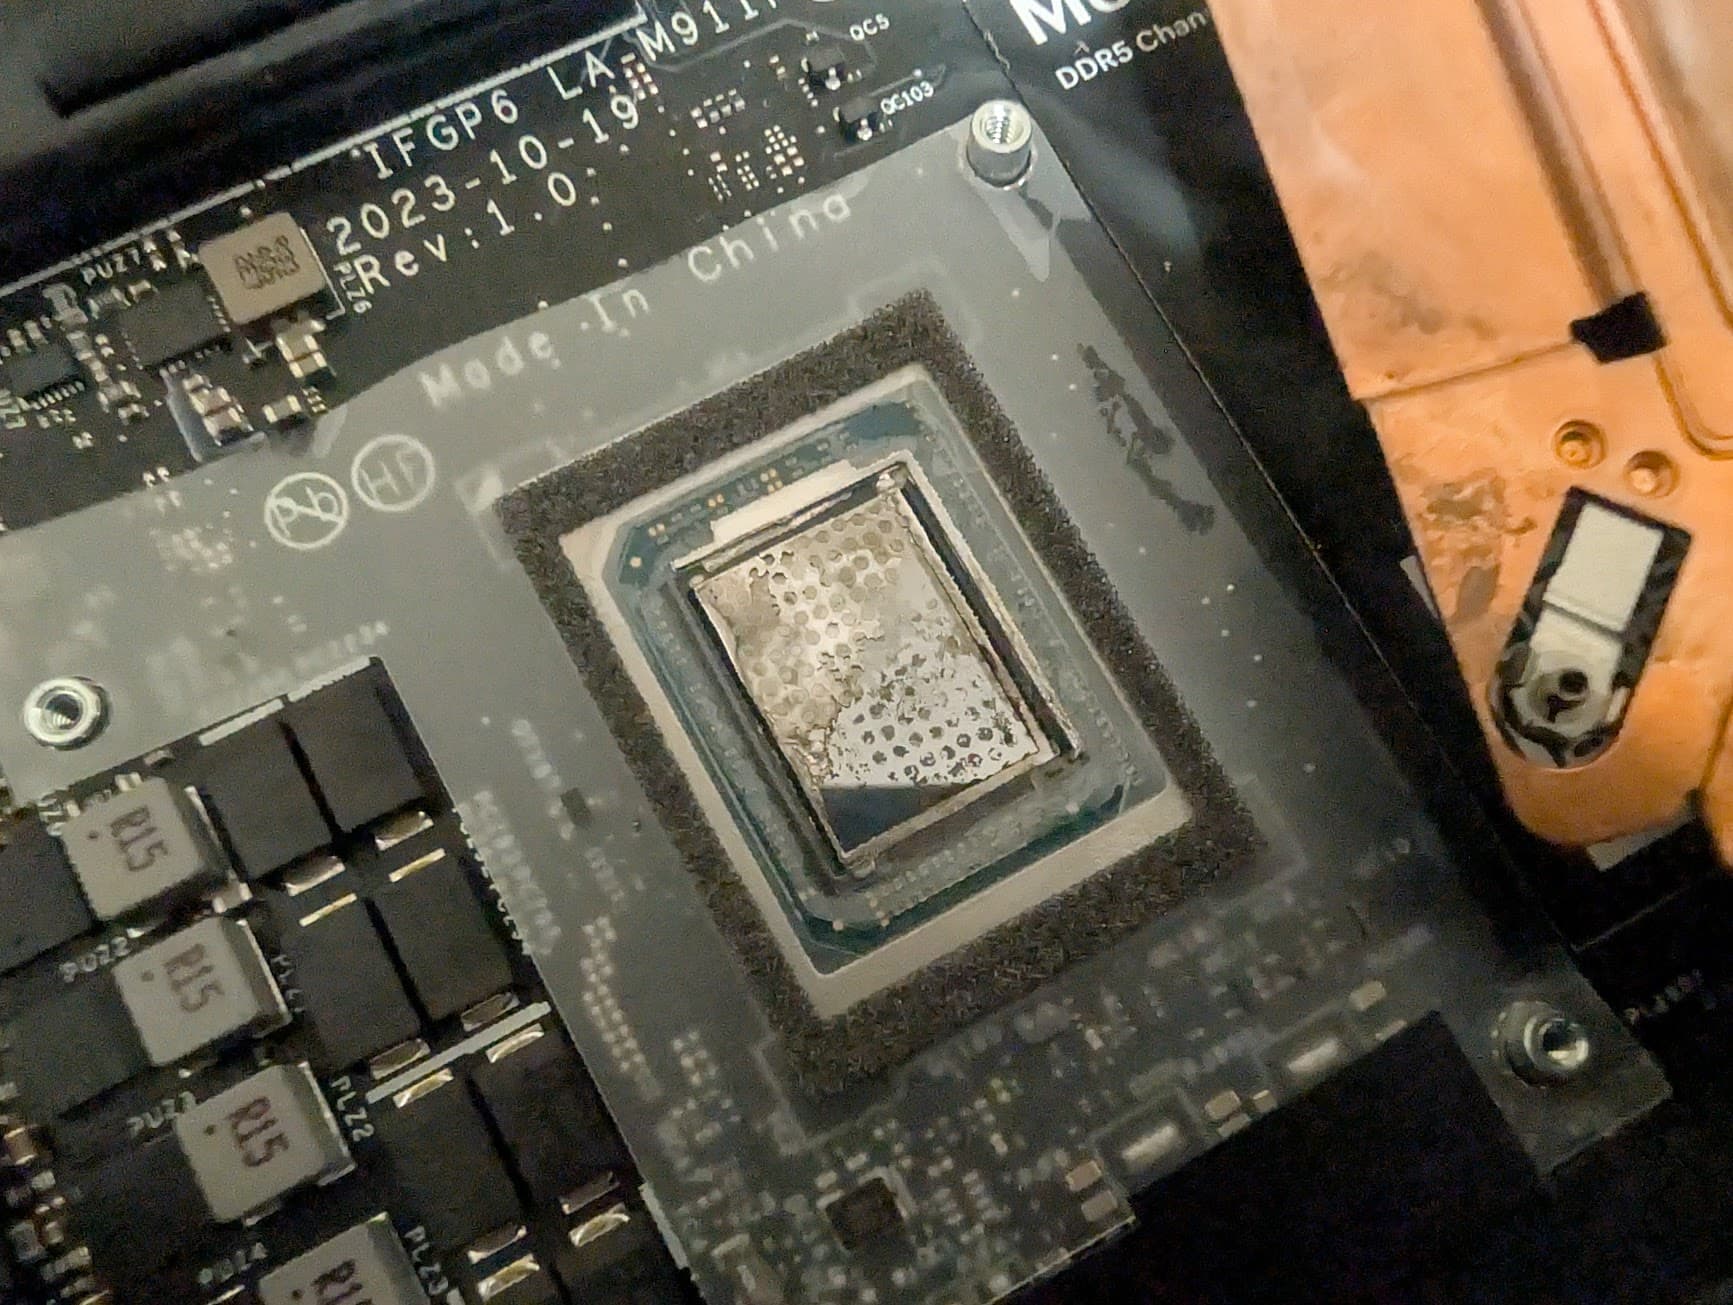
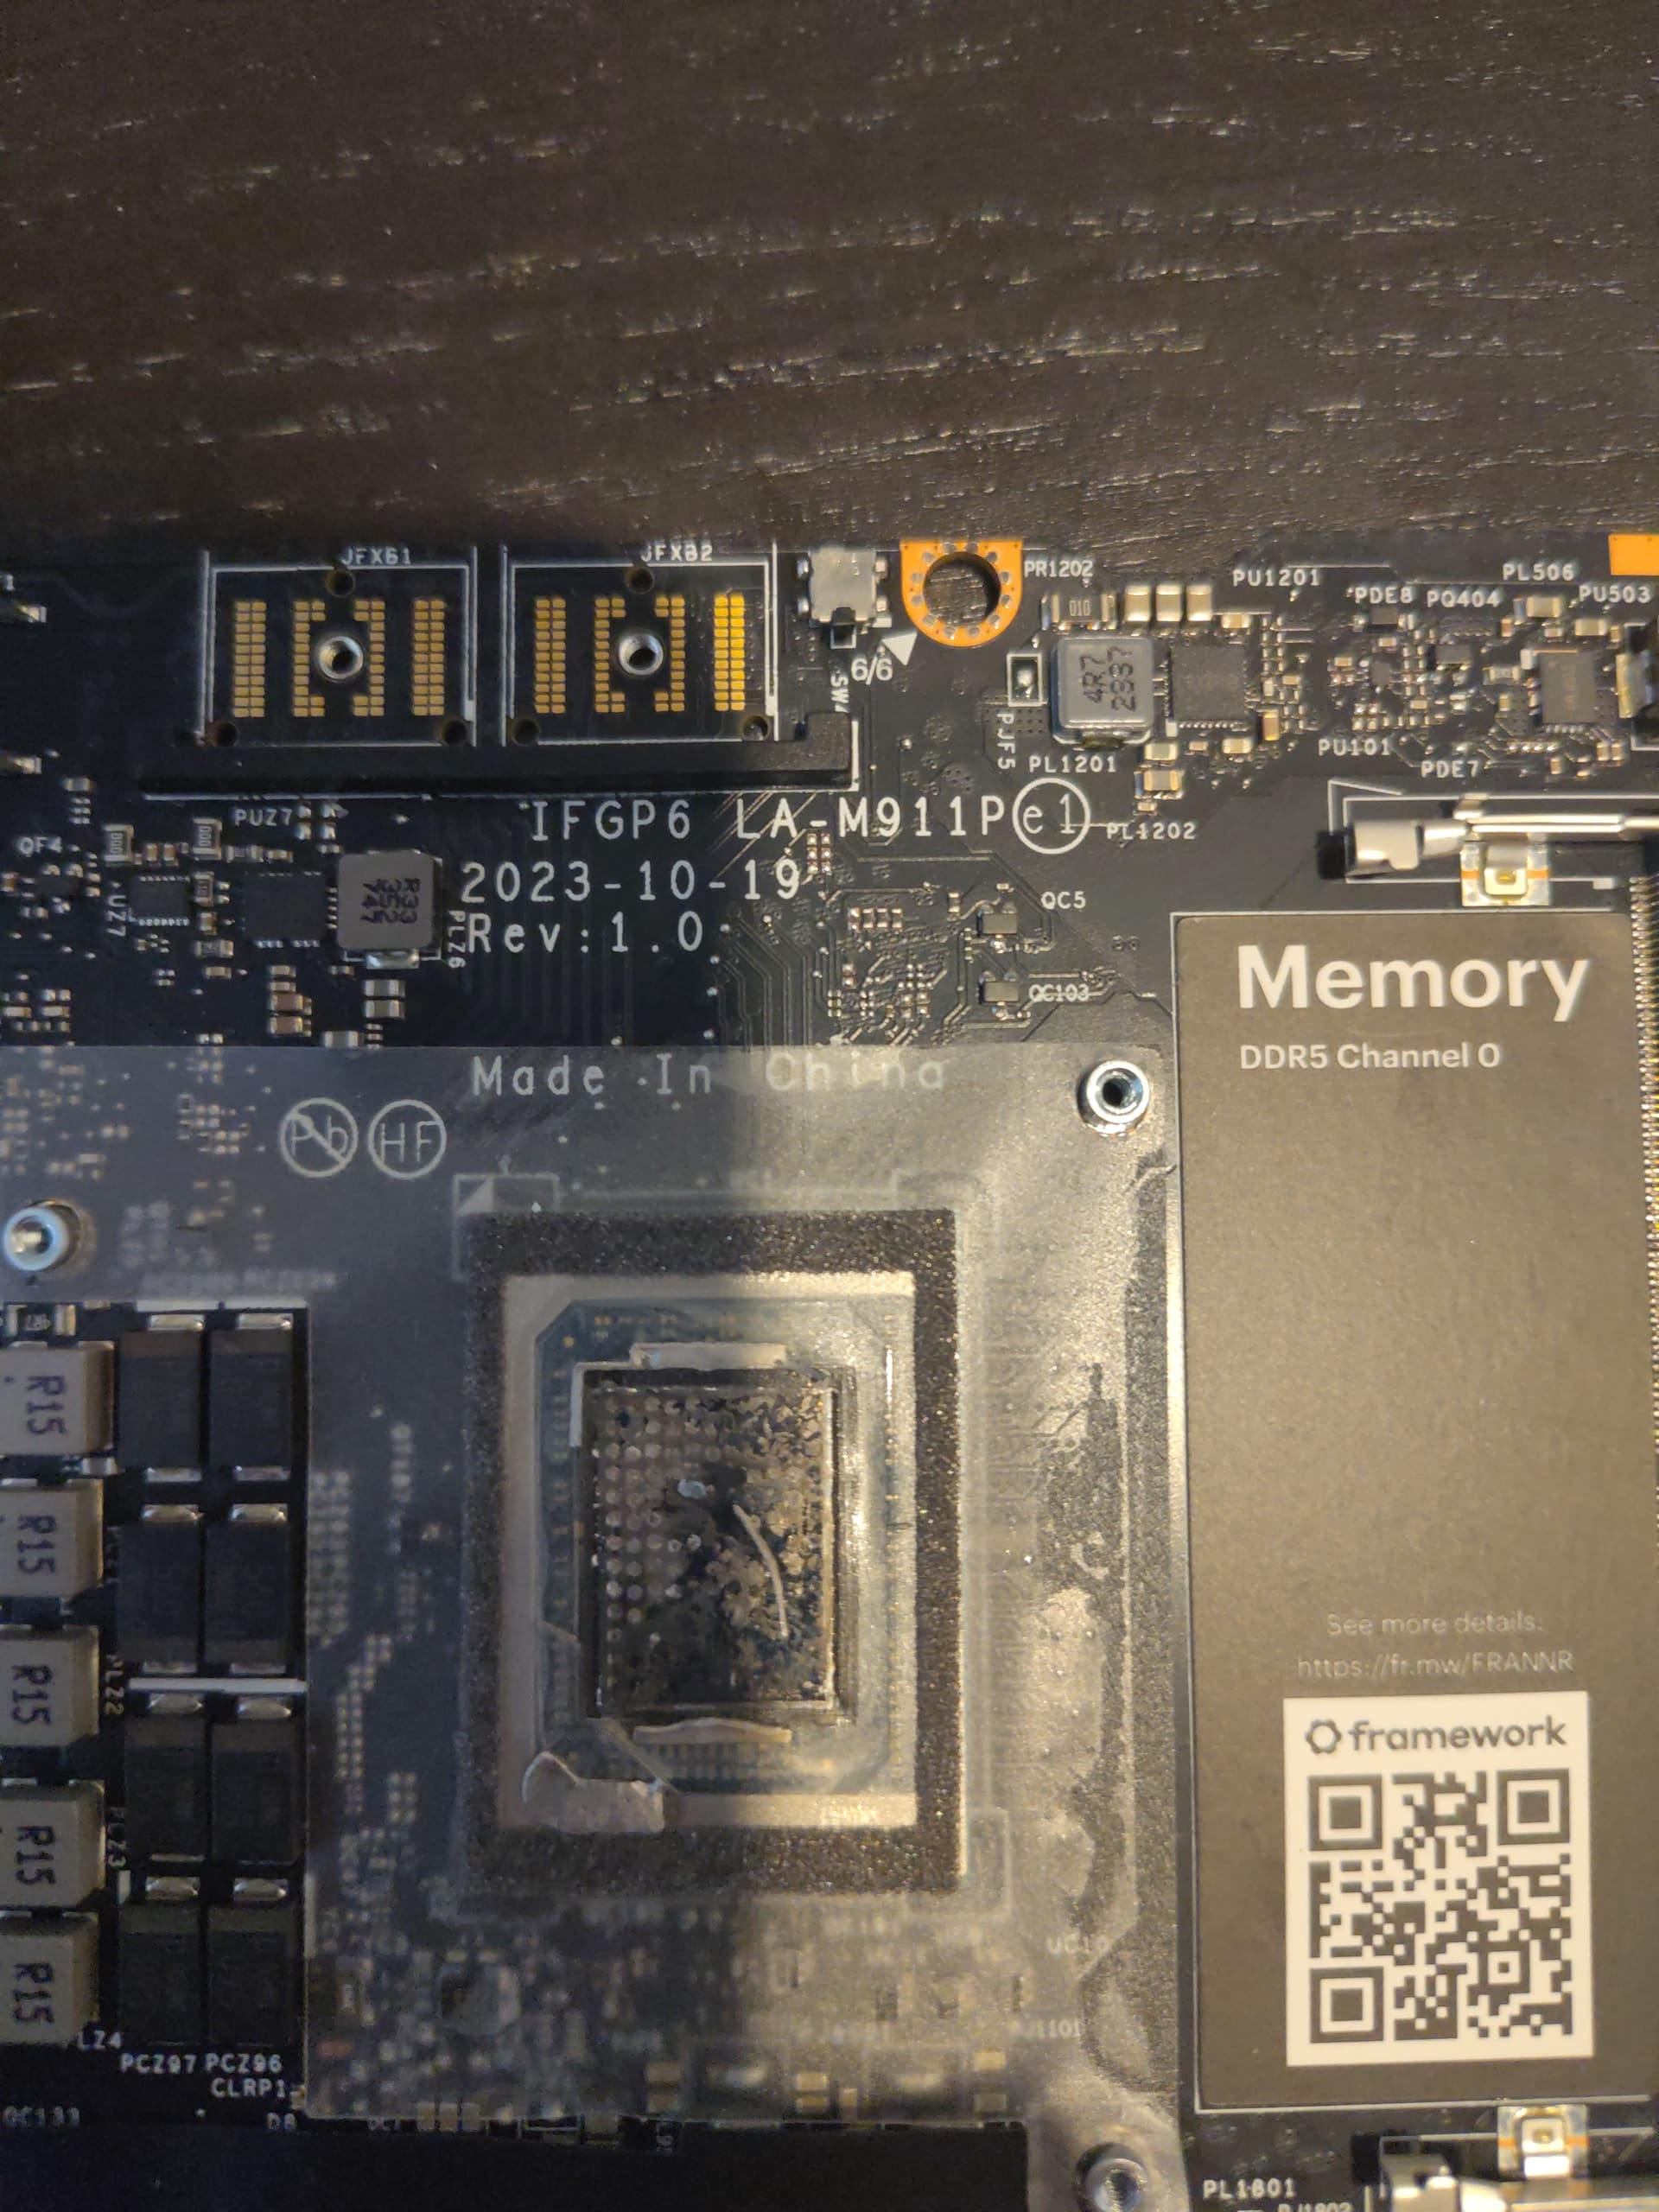
Then I opened up the laptop. I ended up bending one of the heat pipes on the original heatsink prying it off of the CPU die :frowning: It was quite stuck, but using the spudger end of the screw driver, it eventually came off. I cleaned up the liquid metal, which thankfully didn’t seem to have run off much, it was just not evenly distributed across the die. Once everything was as clean, I made a stencil of the CPU out of paper, and used it to cut out a rectangle from the phasesheet. It went on the CPU, and I pressed it down using the spudger. When I removed the plastic, it unfortunately didn’t cleanly stick to the cpu, so I had to try again, and this time it seemed to do the trick. I put on the new heatsink and put the motherboard back in. I ended up catching the audio cable under the motherboard while screwing it back in, which I think damaged the connector, because the speakers don’t work anymore. Everything else about putting the laptop back together went smoothly.

After doing all that, I tested in Cinebench R23 and… didn’t get a spectacular boost in performance. I have the 7940HS with the dGPU. Before, making sure everything possible was closed except for Cinebench, I got 15003 in my best run. Now, my best run has been 15430. Not sure if I made a mistake when soldering the new shim on or applying the TPM or something else. I did install the new beta drivers FW released recently, which may be part of the cause.

As far as temperatures, the spread can still be as far as 7 degrees (celsius) between the hottest and coldest cores. The CPU (Tctl/Tdie) sensor has gotten as hot as 100.5. I may have just gotten unlucky with the silicon lottery. But my system in general seemed to be less affected by the performance degradation others have observed (CPU package power was in the 56W range)

In terms of fan noise, it is much improved when not doing anything that puts a lot of load on the CPU/GPU. They’re quiet during normal usage a lot more now. When gaming or compiling code, they still get noisy, but that’s understandable with the temperature readings and when usage reaches 100% across all cores.

The CPU package power has drawn 58W at maximum, so it’s within spec.

Overall, I think the mod is worth it to have the better cooling, even if not everyone will see a huge boost in performance. I’m not picky about fan noise, but not having them running all the time even when just web browsing or similar is worth it. I’ll report back if I run into any issues or if the performance improves as the PTM goes through thermal cycles. I’ll also test with the AMD drivers vs the Framework drivers to discard more variables.

1 Like

Curious, did you undervolt the processor? I also have a 7940HS and unless I undervolt it the performance stays in the 15k score range. I can get -30 all core stable and it gets me closer to 17k.

I haven’t tried yet! Before doing the mod, I tried undervolting and it was really unstable and couldn’t get the undervolting to persist after shutdown. Do you just set the curve optimiser setting in x86 tuning utility and save it to a new preset? Or do you use something else to undervolt it?

Got my new RMA board ("supposedly without liquid metal) installed and BIOS upgraded to 3.05. Ran Cinebench R23 and I observed

  • CPU package power gone up significantly 30-33W → 47-50W sustained!
  • Score 13k → 15880! This is a massive jump
  • Avg. CPU core temp. 94, gone up from 76 so it tells me CPU is working harder

Specs:

  • Ryzen 9 7940HS
  • 64GB Kingston Fury DDR5 5600
  • 2TB Samsung 9100 Pro
  • Don’t have dGPU
  • Win 11Pro 24H2
  • Latest AMD 25.3.1 (driver only)
5 Likes

Thanks again for your insights!
As I had RMA before and my replacement motherboard started performing like my first one over time - I did replacement like you.

Copper shim 20x20x8 with “PTM sandwich”.

  1. Removed heatsink:


  2. Removed soldered piece from it


    And it won’t soldered good - only partially:

  3. Polished it:

  4. Polished 20x20x8 copper shim (1500, 2500, 7000 sandpapers):


    it’s like mirror :slight_smile:

  5. Created “Sandwich” (CPU → PTM → Copper shim → PTM → Heatsink)

  6. Results ( @~32C room temp as there air heat pipe right near my table):


    and after few heat-cool steps (in continues stress test):

Finally, after few weeks (look at the MAX column!):

On Cinebench R23 I got ~14280 score (maybe due to other processes / antivirus)…

4 Likes

Looks great :slight_smile: the cinebenchscore is pretty dependend on background tasks. Hwinfo alone can decrease the points by 500.
But its a great tool for full load. To further unlock performance, the ppt fast/slow targets and the stapm limit have to be changed and opened, as the system always defaults to 54w after a few seconds.

Software tool for unlock is x86 universal tuning utility and if one want to change it for good you have to change the parametet on uefi level with smokeless_umaf (expert level :wink: )

3 Likes

Finally got round to replacing the LM with the provided PTM.
Things to note:

  1. Pretty much all my LM was squeezed between the cpu die and the foam gaskets, parts of the cpu appeared pretty dry.
  2. The amount of engineering, layers of seals, to make using LM in a notebook is insane, not sure that this technology is really meant for a consumer product. Seems wize that FW migrated away from this stuff.
  3. Cleaning the LM off was painful, took me about an hour by itself as I didn’t want to break my cpu.
  4. Disassembling the FW16 is actually quite a pleasure as long as you don’t want to remove the heatsink, that was hard as there was very little safe pring areas to work with around there.

Re performance. I tested with a full-core s-tui, then checked per-core temps using amdgpu-top.

Before:
It did not matter what power profile I chose it would always saturate at 28W power usage and ~3.475Ghz with the fan at max speed. Core temps 77C to 100C

After:
Powersave profile:
32W, ~3.775Ghz, Core temps 73C - 82C, fan was running audible, but not very loud.
Balanced & Performance profile:
50W, ~4.35Ghz, Core temps 90C - 99C, fan was pretty much at max

This is a VERY noticeable difference, I’m glad I did it. I’m not glad at how annoyingly frustrating LM was to work with.

2 Likes