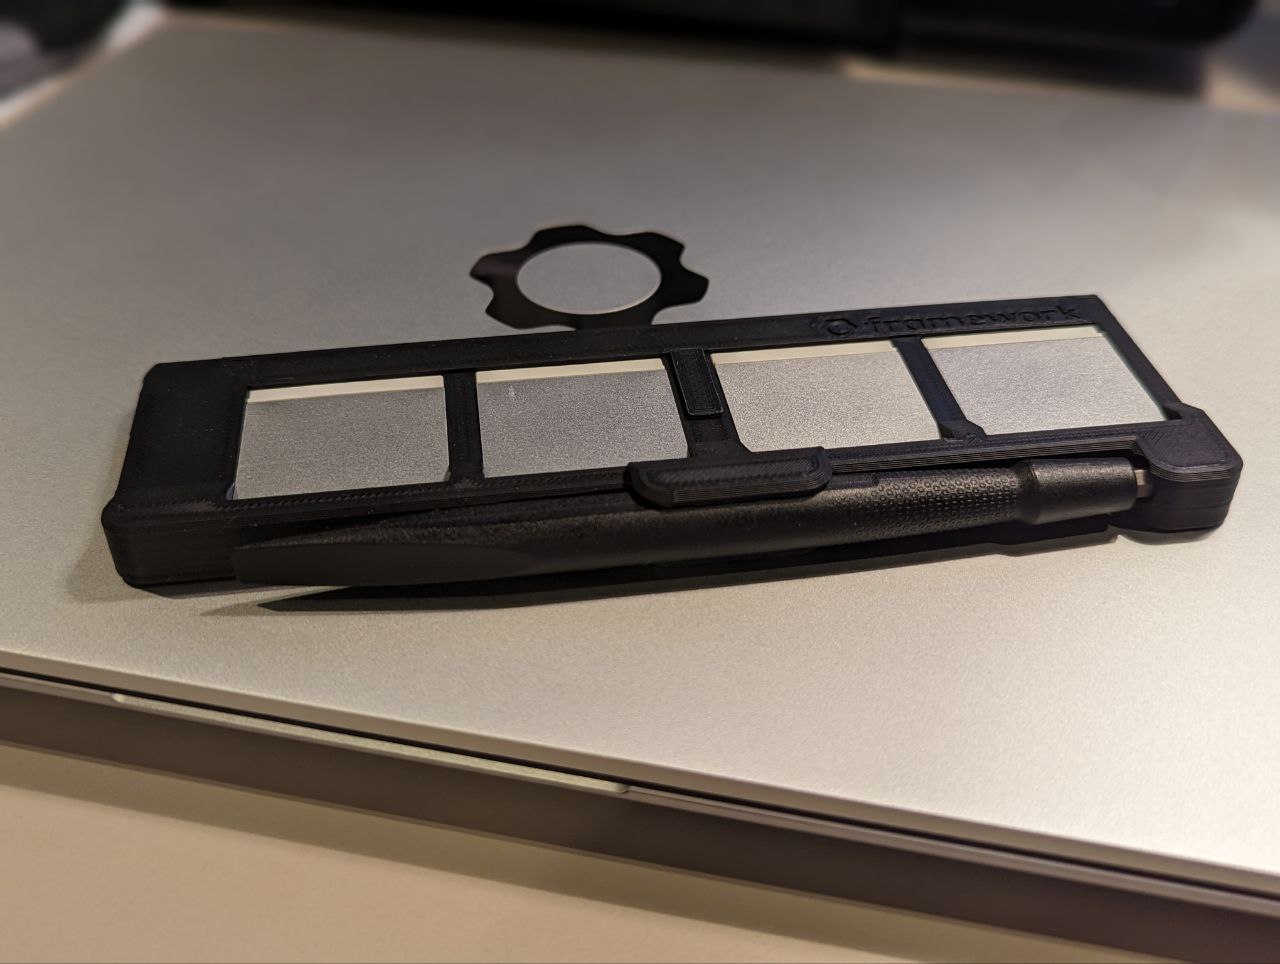
Portable 3D printed expansion card holder

I love your amazing work @mxg! Here’s photos of my print. The friction of the expansion cards against the frame is sufficient to hold it in place for me.


4 Likes

This is so cool!!!

3 Likes

OK, you made me do it. :slight_smile:

Love the designs on these, any ideas on how to make the new Ethernet expansion card work with it?

2 Likes

Funny you should say that because I wanted the same thing. I took bradstopher99’s STEP file and modified the design in Fusion 360 to accommodate the Ethernet adapter.

The files are available at https://www.thingiverse.com/thing:5760284 .


8 Likes


I had to do it!

5 Likes

As part of my quest for everything translucent, it had to be done. Just need that elusive bezel :sweat_smile:

Great design @mxg


4 Likes

Nice. What material did you use?

I don’t have a 3D printer so I found someone on Etsy to print it for me - so all I know is clear PLA filament.

I’d like to have had it printed in a clear resin, maybe it would look closer to the keyboard then, and be truly transparent but the price was way too high to try.

Would anyone be willing to make a 4 module version of this (with one being ethernet sized), I might try my hand at it but I’m only experienced with cinema4D

Love the community that framework has, these holders are exactly what I was looking for!!

1 Like

I really liked some of the designs, but wanted to have one with all features included! So I made my own you can find here :))


12 Likes

Finally!!! This is exactly what ive been wanting. Thank You!!!

1 Like

This is pretty cool, but why does it have that extra block on top? Also appears the notch for the screw driver is filled in for some reason:
image

I love the expansion for the ethernet… so, how about a 4/5 BAY that uses the extra space from where slots where the ethernet card isn’t to hold the framework screwdriver? That would be awesome!

I think the extra block on top is an error. I sliced it off in the slicer (lol) before printing. And yes I still need to grind out the screwdriver notch…

It’s a support enforcer when slicing with Prusa Slicer to print the overhangs correctly ^^ It is a bit tedious, but was also the easiest to print and design

I never used prusa slicer before, wasn’t aware support needed to be baked into the model. I use cura and it will add support for me, which makes it easy to remove. The way this model has blocks filled in, unfortunately, messes it up in the slicer I use. Nice work on the model, but it’s not usable for me in this state.

The USB-C holes ended up being a bit too small when I printed this. Any recommendations on the best way to open them up? Careful Dremel work?

Properly calibrate your printer and reprint. I use an Ender 3 and after all the standard calibrations (tightening belts, wheels, and calibrating extruder), I still need to set Flow rate to 85% in order for it to print things in the proper dimensions.

1 Like

Seriously, thanks for this. I can’t wait to print this when my FW16 arrives!!

1 Like