with “only” 2 NVMe m.2 slots, our funky little desktop box is of course a bit limited in storage. You can of course break the bank and spring for 2 new 8TB nvme m.2 disks, but sometimes you just want to use what you already have laying around!
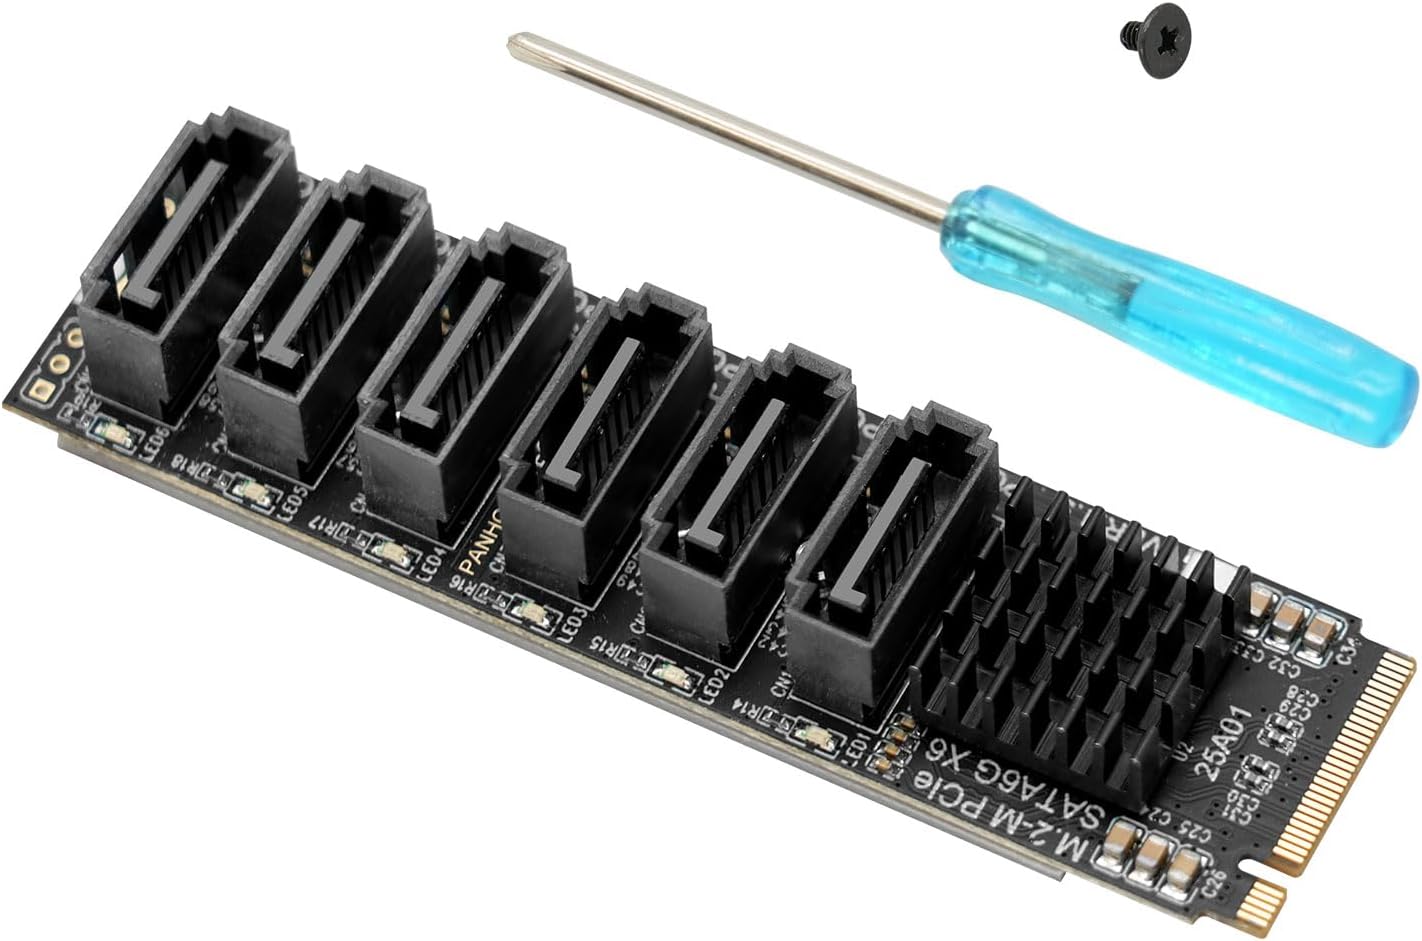
If this sounds like you, my advise is: buy the motherboard, find a nice chassis you like with a nice SFX psu and combine this with something like Delock 5 port SATA PCI Express x4 Card.
WARNING: Anything below this message, is for people who do not care about warranties, know what a soldering iron is & how to read pinout diagrams. I am not responsible if you fry your FW desktop / electrocute yourself / burn down your house!
So, you like to make things more difficult than needed (like me), and you spotted that enormous emtpy hole in the FW desktop chassis between the front panel and the CPU cooler and thought: “I wonder how many SATA drives could fit in there…” , then the answer is: certainly 2, maybe 3.
The challenges:
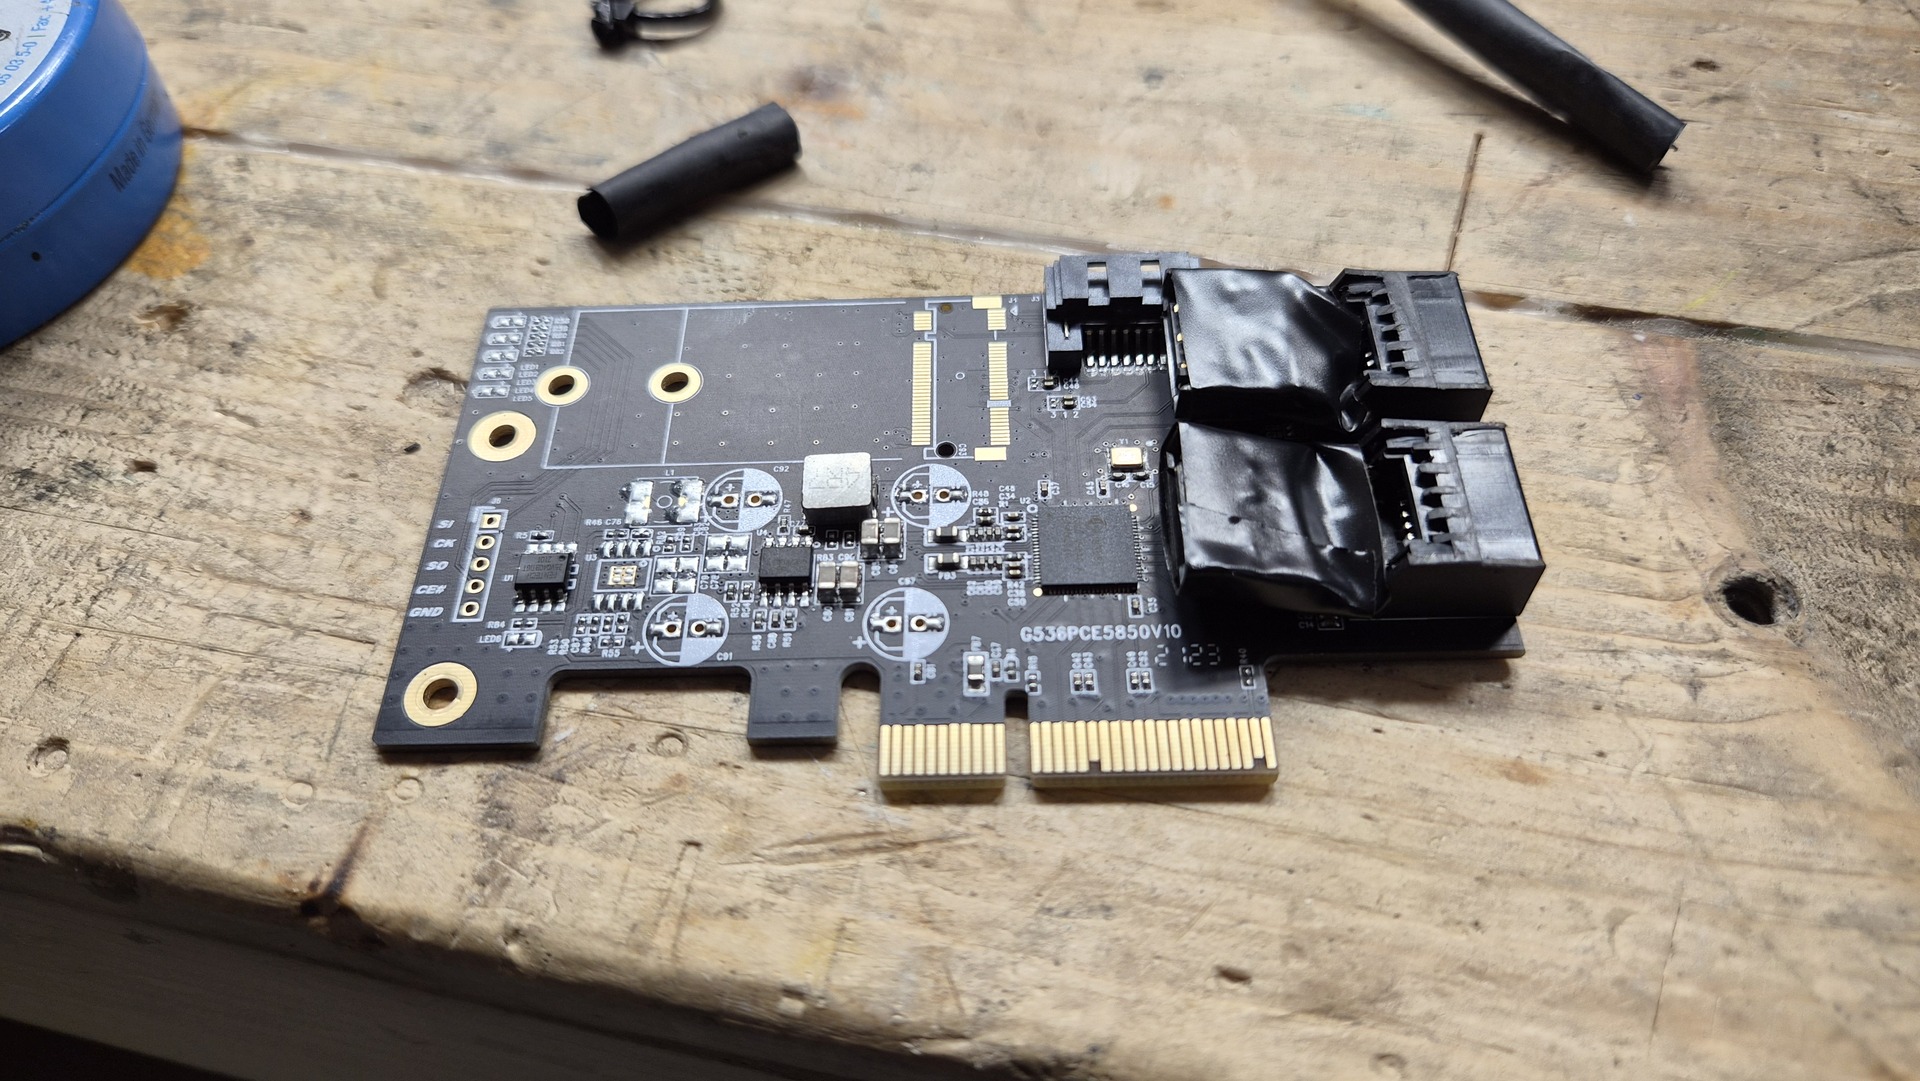
PCIe 4x slot does not have much room.
In fact it has so little room, that the double stacked SATA connectors on the Delock 5 port SATA card do not fit! Fortunately that is mostly plastic, so grab a small saw or whatever chopping device you prefer, and mod it. Also remove the metal bracket while you are at it, there is no room in the chassis for that kind of stuff:

There are no SATA power headers on the PSU.
So we solder those in! Find the wires holding the correct voltages on the ATX 24pin connector, dig through your spare parts box for some PSU SATA power cables (did you know you cannot re-use those things on another PSU? Even though the plugs fit and you get a new PSU from the same manufacturer, there is no guarantee that the pinout is the same!), get the soldering iron hot, and have a little party! Of course make sure you do not drop solder or wire cutoffs into the case. Do not try to decipher voltages and pin layouts from the picture below! Find a pinout diagram (the ATX connector in the FW desktop is completely standard), and double-check your sata power cables!
(If you are wondering how I did this: I used a wire stripper to remove about 1cm of insulation from the needed pins on the ATX 24 pin connector, tinned those up with the help of some flux paste, and then soldered on the sata power connector wire. Afterwards I used a decent quality tape to insulate the wires, and then ziptied them back together)


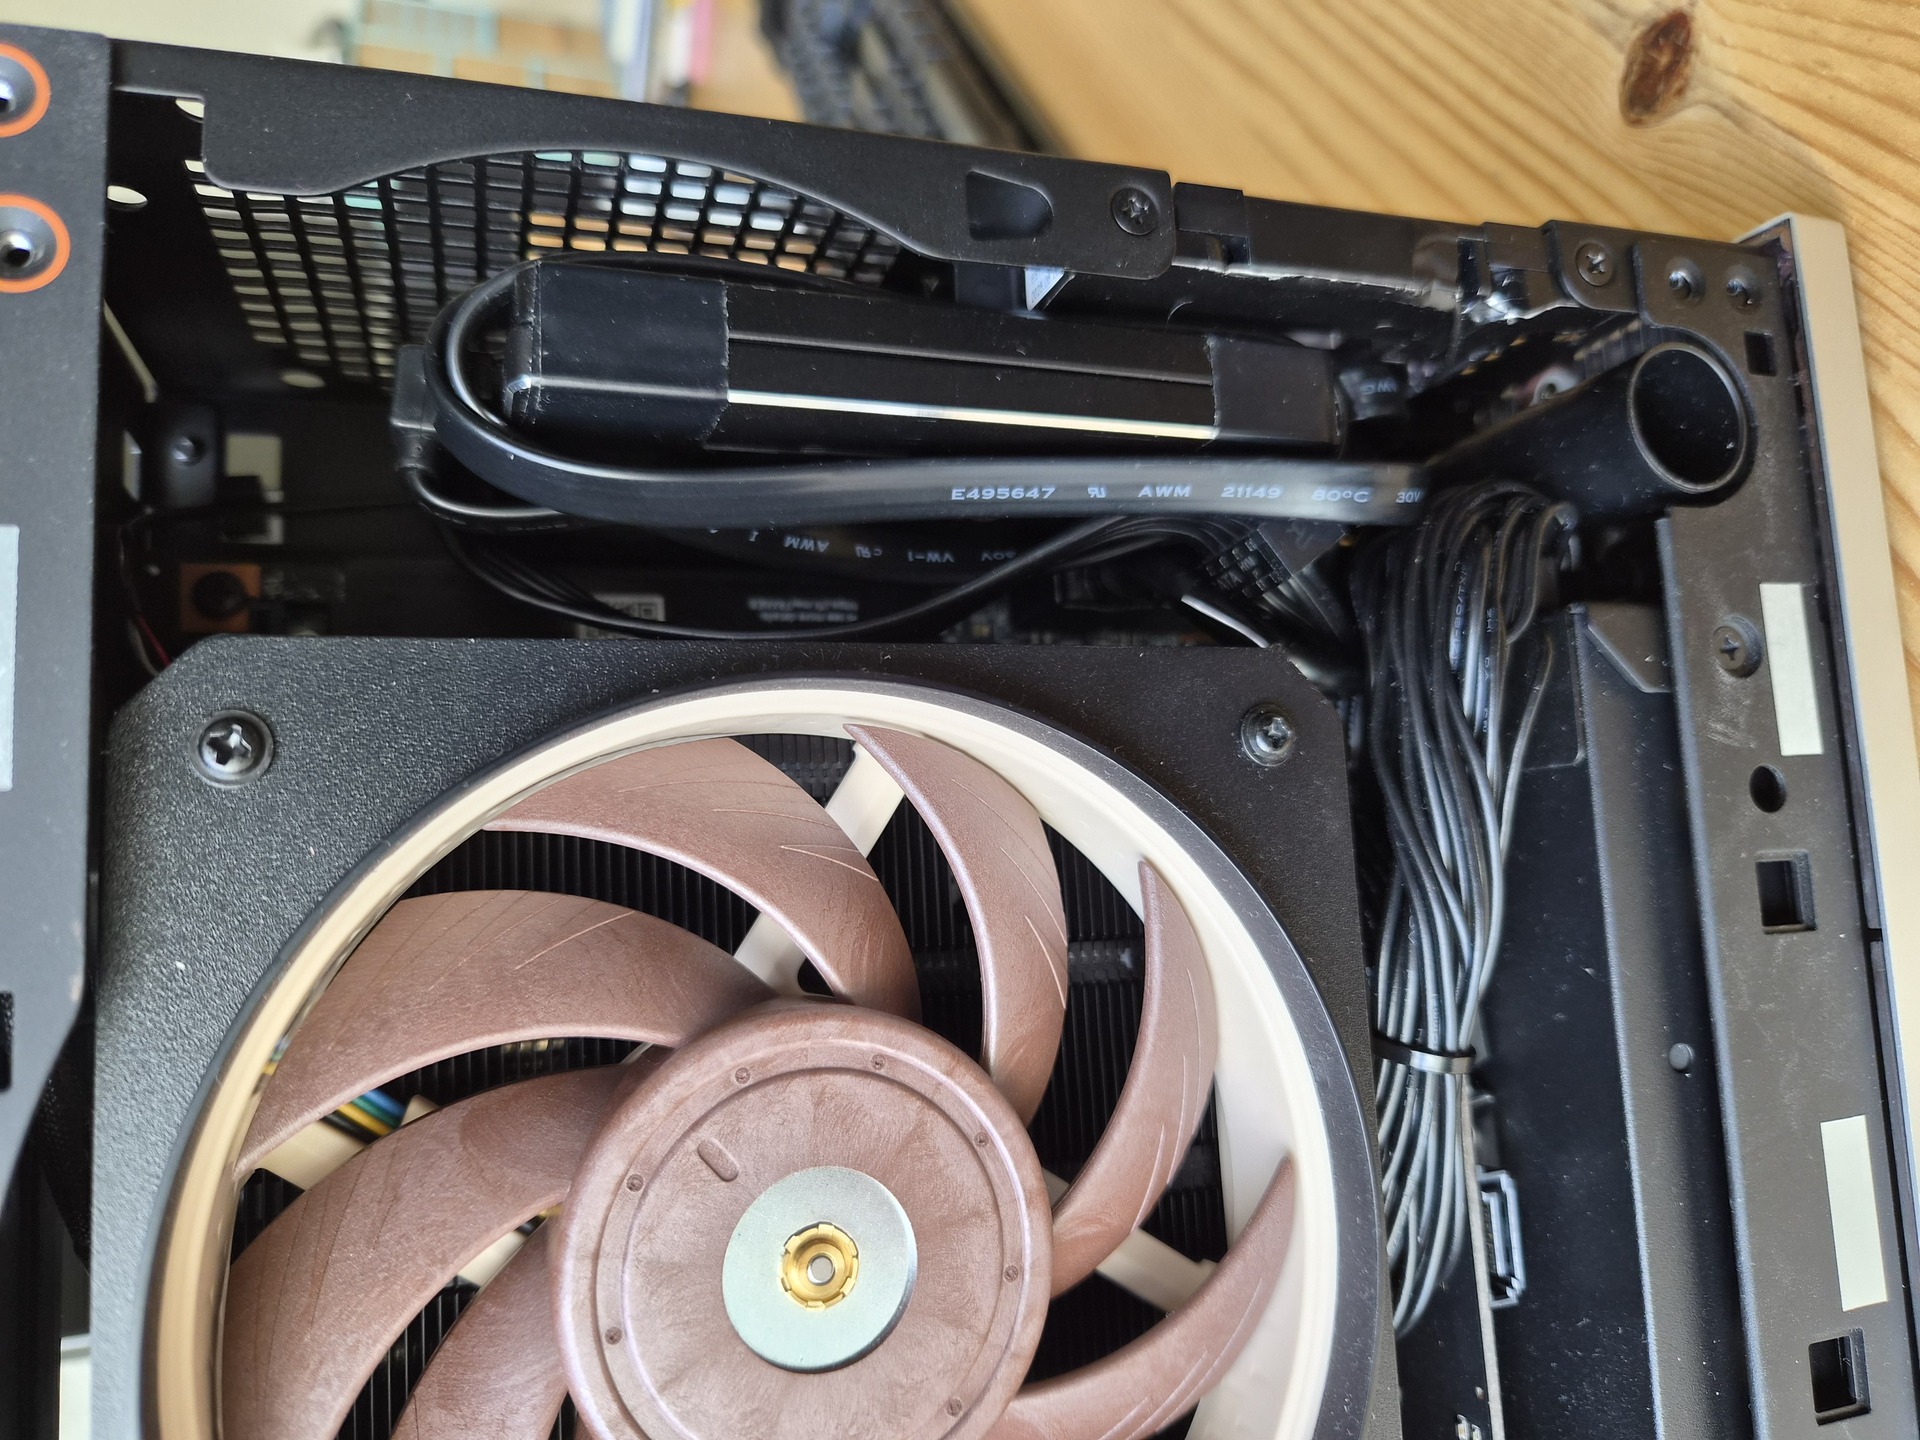
There is not that much left over space in this chassis.
So we play some tetris. You probably have to disconnect the front USB ports (those two thick connectors in the bottom right of the motherboard, get all the power cables to run in a sharper bend to the left, and then floss the SATA data cables through the gap and connect them to the Delock SATA card. Plugging in the card should be one of the last steps. MAKE SURE TO CHECK THAT THE CARD IS FULLY SEATED WHEN YOU HAVE EVERYTHING IN THE CHASSIS! There is not backplate mount on the card, so it can come loose when you are wrestling wires and SATA drives into the case. I found it easiest to tape two SATA SSDs together, with the connectors on opposite sides. You can wrap the SATA power cable around the drives, and the excess of the SATA data cables as well. The shorter your SATA cable the better. Mine were about 30cm, you can do with one that is something like 5-10 cm, and one that is 15-20cm. If you do not need wifi and bluetooth, you can remove the antennas at the front of the case to generate a few more millimeters of space. If you are also willing to bend the metal tabs that hold the antennas in place, there should certainly be enough space to squeeze in 3 SATA drives. Two was enough for me, see the result of my Tetris session below:

In the future I might look at 3D printing a little bracket for the drives, but they are pretty wedged in there. I would not recommend doing this with HDDs by the way!
This mod is not extremely difficult, but if you are new to using a soldering iron, maybe start on something a little bit less expensive and complex ![]() And keep in mind that you should only do this kind of stuff if you can afford to break it!
And keep in mind that you should only do this kind of stuff if you can afford to break it!