Here’s a concept for an Expansion Card that provides three programmable buttons. My buttons are mapped to taking a screenshot, toggle “Do not disturb”, and opening a terminal. I’ve got everything working in concept but not a complete put together card.
I first started with a Teensy 2.0 flashed with a 1x1 layout QMK firmware. I wired up the Teensy with a button switch and everything worked. The Teensy itself is too big to fit in an Expansion Card and only has a mini USB connection.
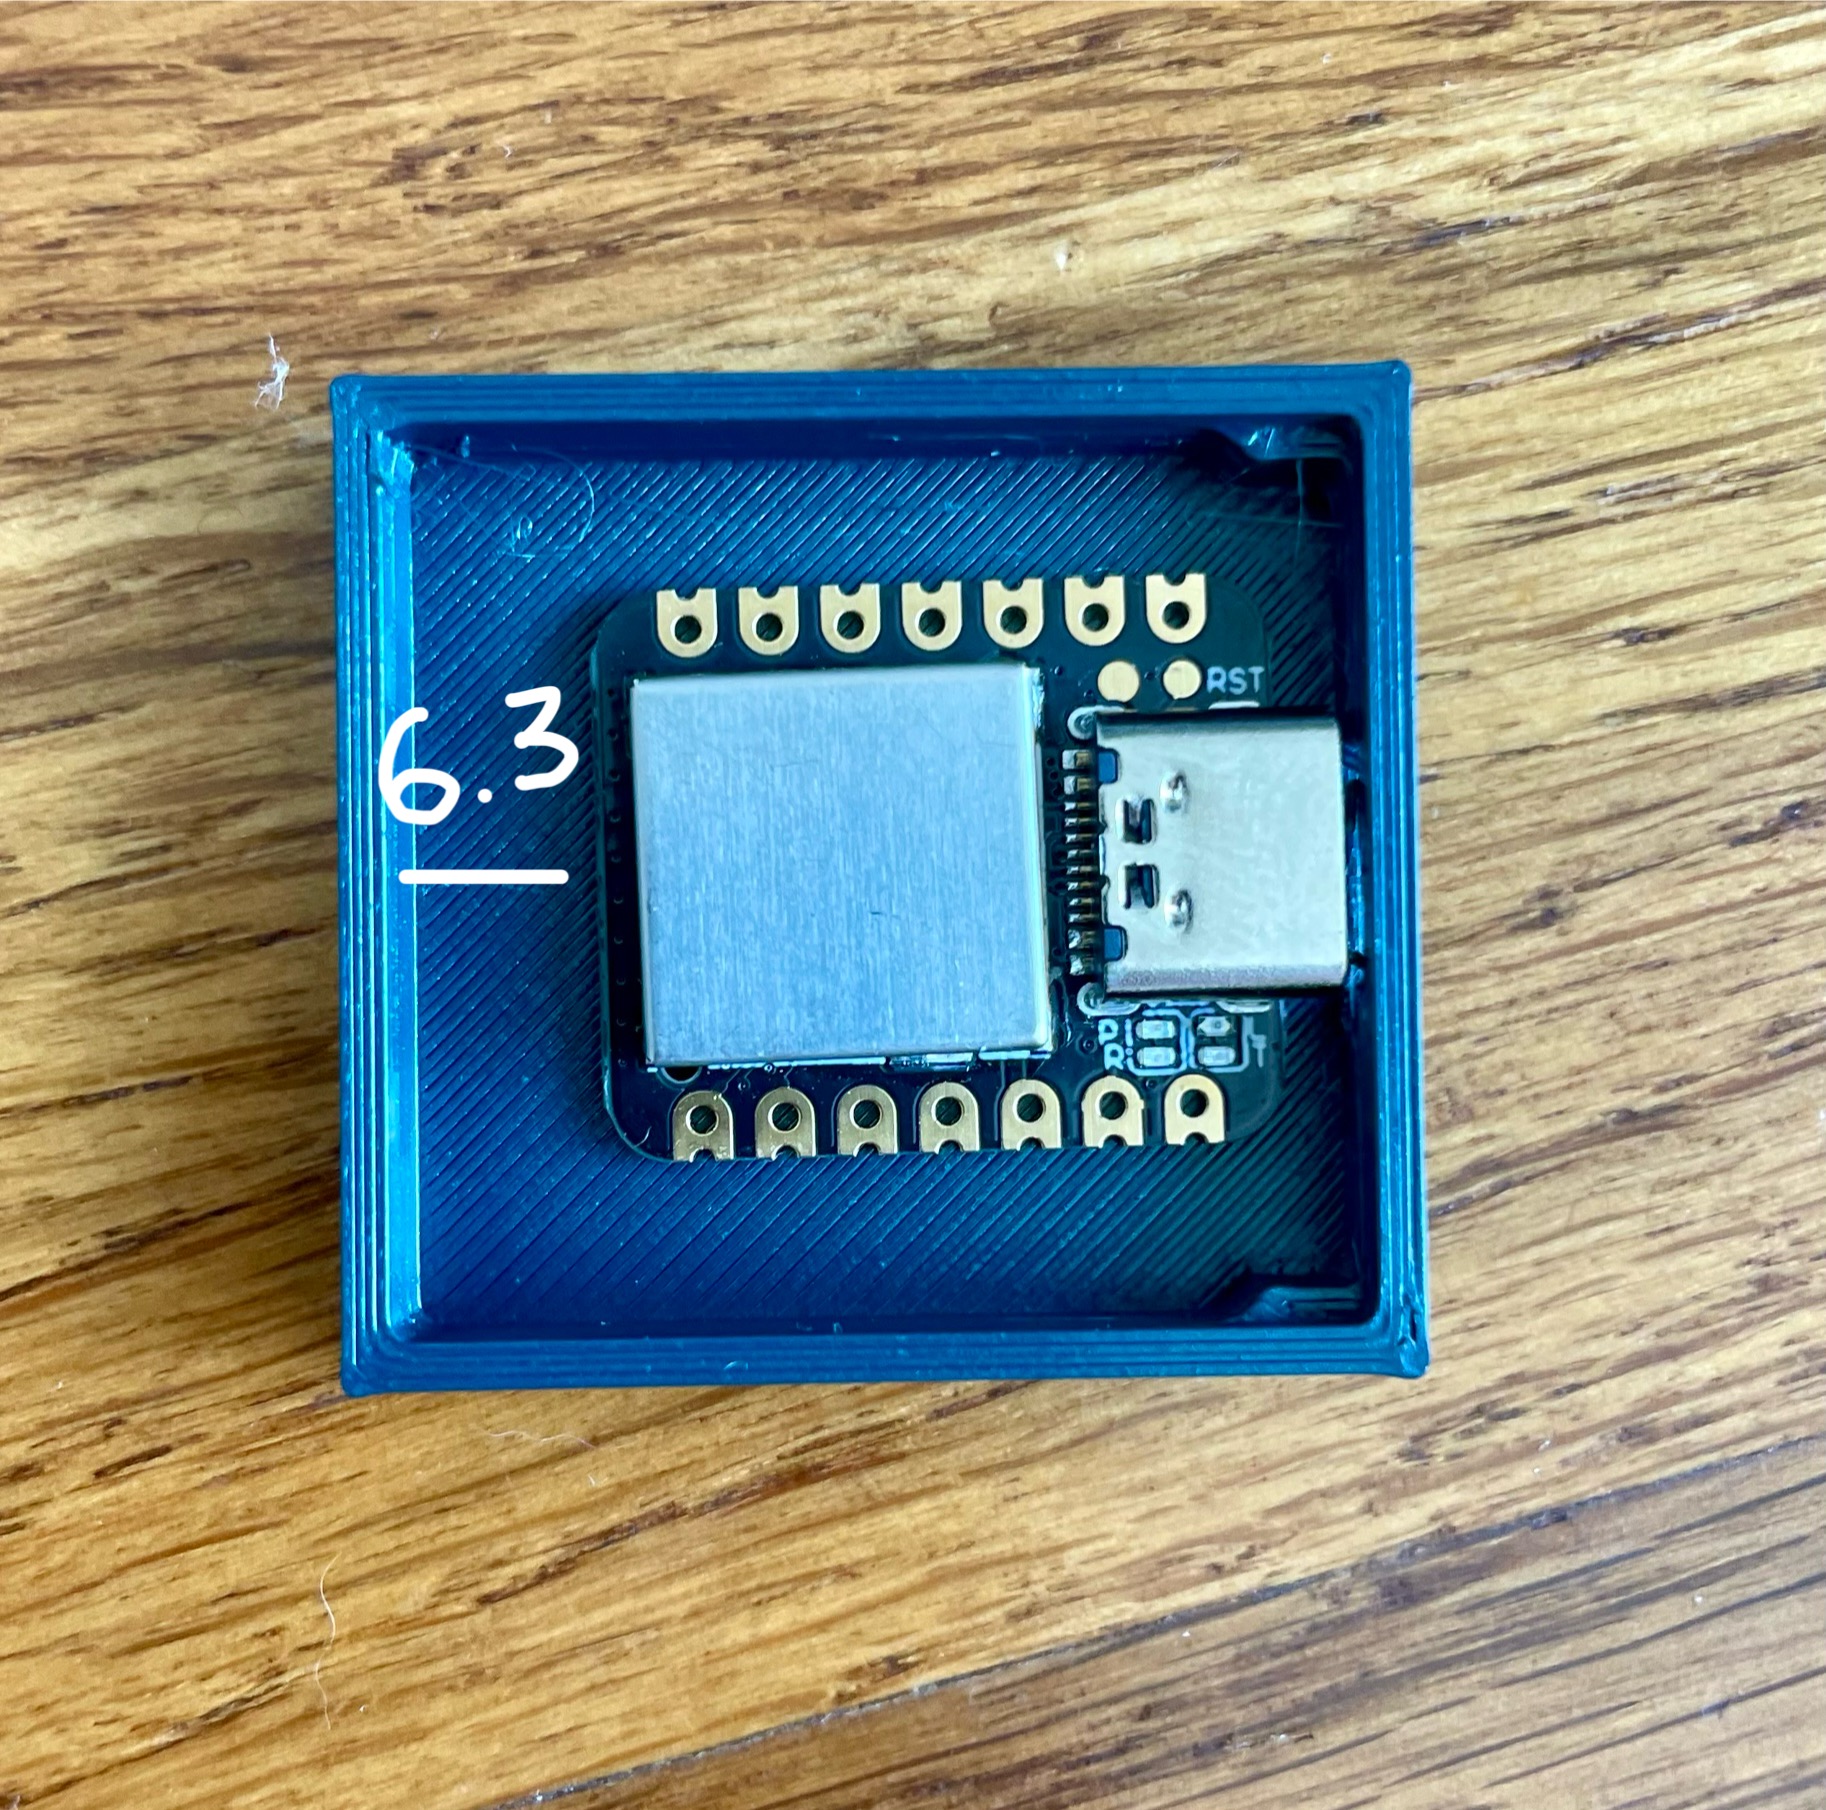
In trying to avoid designing a PCB I ordered a Seeeduino XIAO. This MCU is really neat - very small, USB-C, and compatible with Arduino. It can fit in the dimensions of an Expansion Card.
I first started by flashing it with a ZMK 2% Milk layout without much luck. I think the only supported keyboard for the XIAO is hummingbird. Instead I opted for some simple Arduino code using its included Keyboard library. The code just sends some obscure keyboard inputs on button press, Left Shift + F20 for example. The circuit is very simple, just 3 button switches and some 10k resistors. I used Ubuntu’s Settings to map these buttons to a few different functions like taking a screenshot, opening a terminal, etc. I imagine any keymapping tool would work here.
My next problem is that the Seeeduino is a USB-C socket so I need a USB-C male to male “adapter” for this to work as an expansion card might. Basically the shortest possible USB-C cable.
The working prototype is definitely just a proof of concept - I have has some wires connecting the buttons to the rest of the circuit as everything won’t fit. I have no idea what I’m doing so I’m curious what next steps I could take. Any advice would be great!
the circuitry is simple, should I just do a quick PCB with the SAMD21 MCU? I’m not quite sure what to do here… how would I flash the code onto the project. Will a PCB vendor do that too? I’ve never had something like this made.
Your goal at this point is just to get a working button expansion card that all fits?
You mean, can you solder two USB-C plugs together without a PCB? Technically yes, but those pins are fine pitch. It’s going to be hard without using a PCB. There are USB-C “breakout” boards that give you wider spaced spots to solder, not sure if you’ll have room for two of them though. If you have room, that’s the way I’d go. But I’d get one with a CC line available.
Rather than a Seeed XIAO SAMD21 I’d suggest a RP2040 board. Since RP2040 is well-supported by QMK. Seeed has one, the XIAO RP2040. There are a lot of other small RP2040 boards, especially on aliexpress. A few boards even smaller than a XIAO. Though, alie can be hard to search, and a random board might not be the best when starting out.
The RP2040 was made to be easy to get your program onto it, and hard to “brick”. It shows up as if it’s a flash drive when it has no program, or when you trigger bootloader mode. You can just copy your program over to it, even drag-and-drop the file over.
~edit~
Did you already order a Seeed XIAO SAMD21?
I missed that in reading your post.
I haven’t used a SAMD21 board myself.
Yes exactly - I’ve got everything working on breadboards and in a prototype card with some external wiring. I would like to get everything fitting without ordering a PCB (instead just using the XIAO) which is why I was thinking about hacking together the USB-C male-to-male connector. It doesn’t sound like a good idea though and maybe it’s time to just design the PCB.
I’ve got the buttons working with the Seeed XIAO SAMD21 via the Arduino IDE and some code that I’m able to flash onto the board. Is there an advantage to switching to an RP2040 and using QMK here if I’ve already got everything working with the SAMD21?
For windows, you can deactivate for each input device separately, if its allowed to wake the computer. I imagine something similar is available for linux. This would solve it(?)
If the Seeed XIAO SAMD21 is working well enough for you, then you can certainly stick with it.
RP2040 with QMK would offer easier reprogramming of the keys / buttons and also lets you do more with the keys. With Vial or Via, which is built on top of QMK, you can easily change things in a nice GUI. You can double tap a key, triple tap, tap & hold, double tap & hold, press two buttons together, all with different functions. You can send macros, scroll movement, mouse buttons. All through an easy point-and-click GUI. Vial has Win/Linux/Mac desktop apps and a web browser GUI as well.
Downside is that it will take more work to set up initially. Especially since you have something already working.
With a RP2040, programming (putting Vial/Via & QMK code on it) doesn’t even require setting up an Arduino IDE.
I put Vial QMK on my 15-button mouse using a small RP2040 board.
As long as there is room, making a USB-C male-to-male adapter would be fine. Connecting them with short flexible wires, then you can position it however you need. I’ve made custom USB-C cables. Space is the question, though. What’s the internal space inside your enclosure?
Might fit. With the XIAO board either positioned down left, away from the USB hole, or at a 45° angle.
USB-C male plugs are 8.25mm wide, you could use that as a reference to measure the length of these plugs from the pictures, and check that it will fit.
Interested if this expansion card concept got fully fletched out in the end! Physical buttons on expansions cards are an idea I’m exploring and trying to find similarly easy-to-implement solutions for.
If you can solder wires and can make a 3d printable case to hold buttons in place, then you could make one. If you don’t have experience in modifying 3d models (in order to add holes and holders for buttons), and don’t want to get into learning it, you could drill holes in an existing case & use hot glue for holding buttons in place. Also, services like craftcloud3d.com will print an existing model, like the free “snack drawer” card a community member made.
I didn’t spend much more time on this project unfortunately. Wiring the buttons and coding them to have functions was pretty straightforward, the issue was more about trying to fit the micro-controller into the Expansion Card housing with a male USB-C connection. My micro-controller only had a female USB-C header meaning that I had to use a USB-C cable to use the card. I kind of stopped here, but some ideas for next steps were:
Resolder the USB-C female header to a male one, but this seems difficult.
Find some micro-controller dev kit that has a male USB-C header.
Design the PCB with the buttons and a USB-C header based on whatever micro-controller (mine was the Seeeduino XIAO), or the XIAO RP2040 recommended by @MJ1 for easy QMK integration.
Modify the Expansion Card development kit to have a USB-C header and order the PCB. This could be easier than the above option as there are KiCad templates available that can be modified with the USB-C header and buttons.
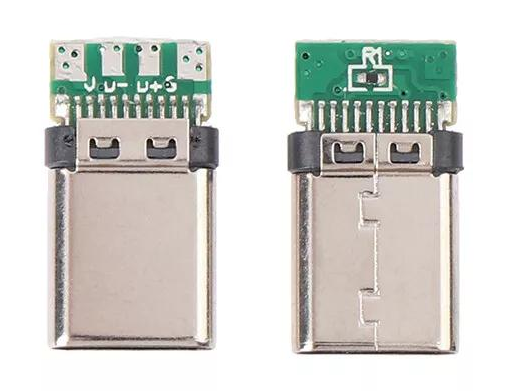
These are very common USB-C male plugs available on amazon, ebay, aliexpress, intended mainly for making cables I presume. One ebay listing. Search “Type C Male DIY Solder Plug”. You’ll also find others, some not exact but similar.
The length, USB-C tip to back of PCB, is ~15mm. For the end going into the Framework’s port, the majority of that length, 8.5-9mm, I believe should be extending though the expansion card case. And if you need to, you can file a mm or so off the pcb. The vias near the end aren’t needed electrically. They appear to just add security to the pads in the event the cable is pulled, and it’s trying to rip the pads off. Most at the end aren’t connected to anything on the backside.
I might have one of that type on hand. I’ll look later and give caliper measurements if I have one.
If there isn’t quite room for the plug that would go into the XIAO board you have, I can search up a board that can fit. Inexpensive. $5-10. I’ve looked a several in the past that should work. I used one in my mouse to convert it the QMK.
Thanks for the info! I bought some of these Simple USB C Socket Breakouts a few months ago. I never got around to messing with them as it is a lot of jank so that I could avoid putting together a PCB design.
I ended up getting a Seeed Studio XIAO RP2040 and was able to flash it with QMK firmware, it was pretty straightforward. I plan on finally getting into KiCad and putting together the PCB. It’ll be a learning experience as it’s my first one
Sorry for the late reply, I’ve been sleeping on this effort a bit. There was a recent reddit post for a similar concept, maybe it’s time to get back to this project.
How did I not see this earlier? This is a great idea that I think could really be helpful for all kinds of workflows and use cases. Need to read through the read some, but just wanted to apologize for not noticing this earlier!